It could be very time consuming to solder and connect a large number of WS2812 LEDs - thankfully they are also available in strips, panels and other shapes from eBay and Amazon. The applications of these types of LEDs are really unlimited: electronic wearables, special effects, robotics, and entertainment.
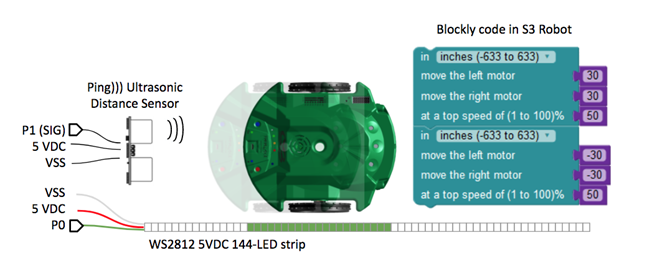
This project demonstrates several uses for a 5V 144-LED strip of WS2812s: one simple program for creating a scrolling rainbow pattern, and a more complex program that uses the S3 Robot and the LED strip as a distance indicator. A PING))) sensor mounted on a Propeller Multicore breadboard sends the robot’s distance to the Propeller microcontroller, which outputs a green LED pattern at the robot’s location. The S3 Robot is a good candidate for this project with it’s 500+ encoder counts per wheel revolution, ensuring the precise position so the robot stays within the PING)))’s focal point. Some simplifications were made in the development this code to make it easier for others to duplicate.
A larger number of LEDs require an appropriately-sized power supply with enough current to drive them. This might be a lithium-ion or lead-acid battery since Parallax boards (FLiP and Propeller Activity Board) usually provide less than 1A of current at 5V from an external power source and less than 500 mA from a USB cable. In our case, we are only lighting a small number of LEDs on the strip at one time, so we can use the USB cable as our power source. If you wanted to light all LEDs at once, this power supply would be insufficient.
Parts List
- (1 or more) - WS2812 RGB LED strip from eBay or Amazon
- (1) - Ping))) Ultrasonic Distance Sensor
- (1) - S3 Robot
- (1) - FLiP Module or Propeller Activity Board
- misc jumper wires
I/O Connections & BlocklyProp S3 Code
- Propeller P0 to WS2812 RGB LED’s signal strip (often green or white - see the documentation from your supplier)
- WS1812 RGB LED strip red and white to Vdd and Vss (GND)
- Propeller P1 to Ping))) Ultrasonic Distance Sensor signal line
- PING))) Ultrasonic Distance Sensor connections to 5VDC and Vss (GND)

Scrolling Rainbow Program

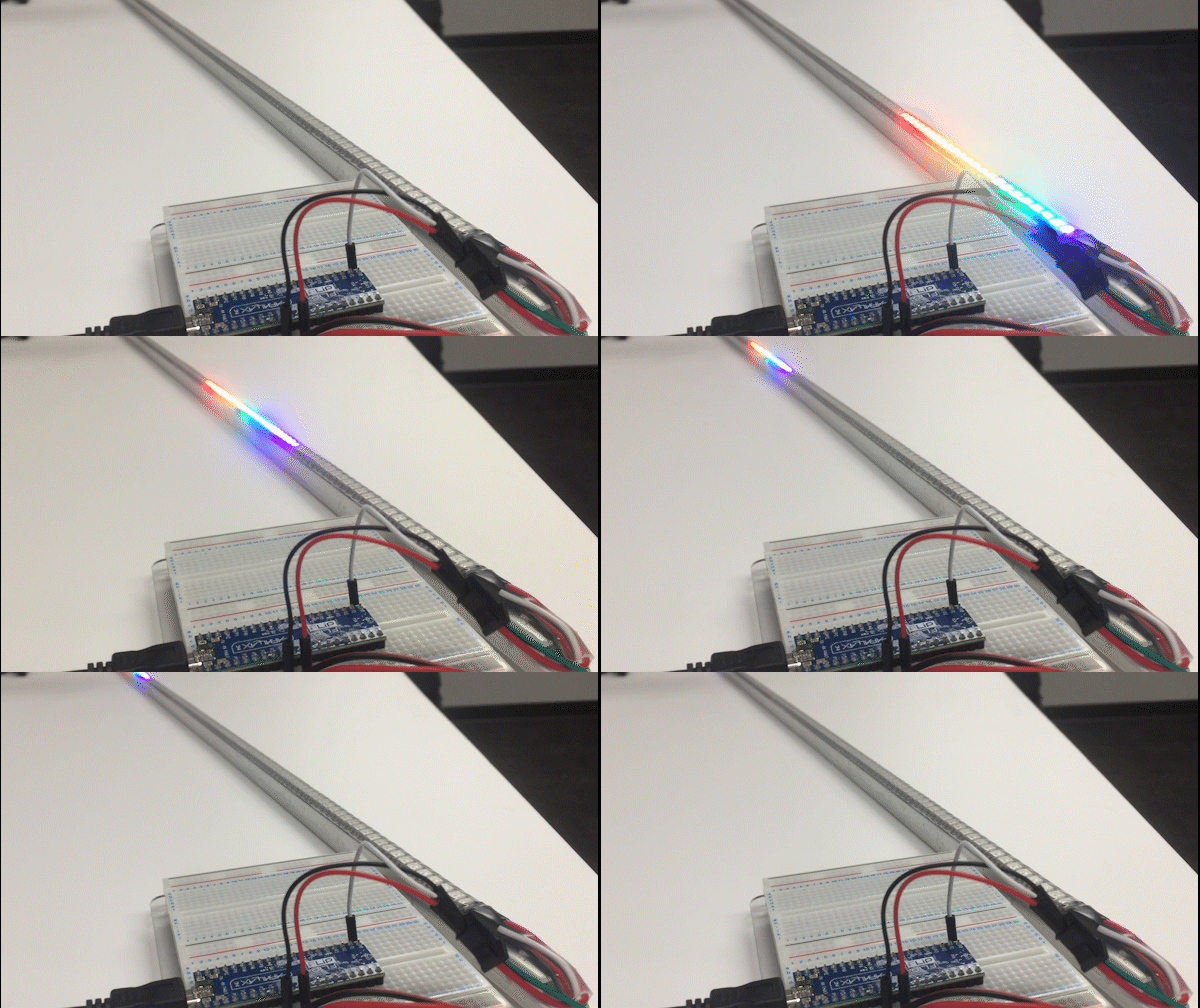
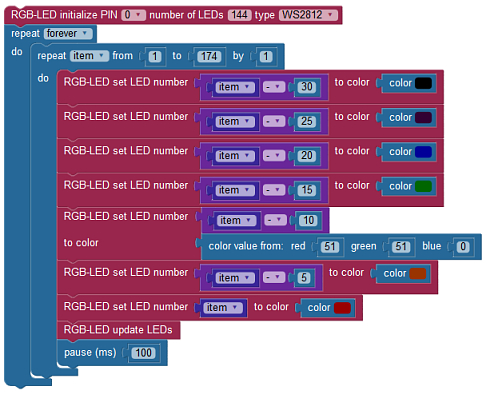
Before we get the S3 or PING))) involved, we should test to make sure we can get a good scrolling rainbow pattern on your addressable LED strip. Blockly makes it easy with the WS2812 Rainbow Scrolling 144 LEDs code download:
Project4443-WS2812-Rainbow-Scrolling-144.svg

S3 Robot LED Strip Distance Indicator
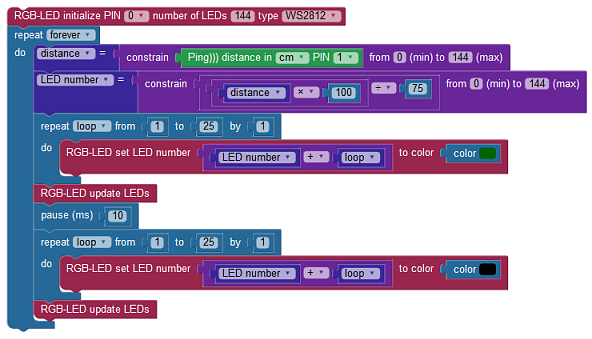
The Blockly project is WS2812 S3 Robot Distance Indicator, below:
Project4615-WS2812-S3-Robot-Distance-Indicator.svg

How the Code Works
A few questions need to be asked early in the development of this project to write a simple example. Some of those questions might be:
- How long is the LED strip?
- Answer: it’s one meter.
- How many LEDs does it have?
- Answer: 144 LEDs.
- Is there a simple relationship between the Ping)))’s distance in centimeters and the number of LEDs?
- One LED is about 1/144th of a meter - 0.69 cm from the start of one LED to the next. If the S3 Robot is 50 cm away and 50 LEDs is about 35 cm away then there’s no one-to-one relationship - the distance shown on the LEDs would always “come up short”. We need to light more LEDs up.
We could simply multiply the address of LED representing the back of the S3 Robot by a ratio. Since there’s no floating point math in BlocklyProp, the simple solution is to multiply the distance by 100, divide by 75, and make that the first LED to illuminate. Experiment to find the right ratio.
Once the LED number is calculated we can use a repeat loop to illuminate the next 25 LEDs. 25 LEDs is approximately equal to the length of an S3 Robot. After a 10 ms delay, the same LEDs are turned off (with the black color) and the process of detecting the robot’s distance starts again.
