Self-check
In this tutorial, you set up a circuit prototyping system.
- Do you know how to locate a socket on the breadboard by its row number and column letter?
- Do you know which sockets connect to power and which ones connect to ground?
- For any given socket, do you know which other sockets it is connected to?
- Do you know where to plug in two wires so they are connected to each other?
Exercises
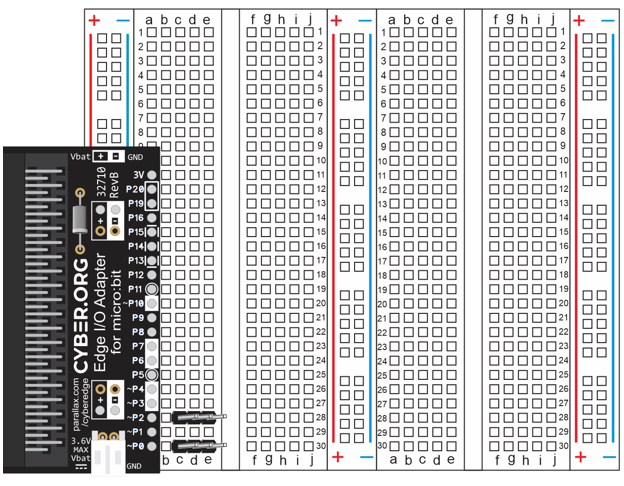
For the following exercises, download and print the attached PDF or a larger version of the image below to circle and label sockets. If possible, test for continuity on your actual board.
Breadboard Setup & Testing Practice and Answers (.pdf)
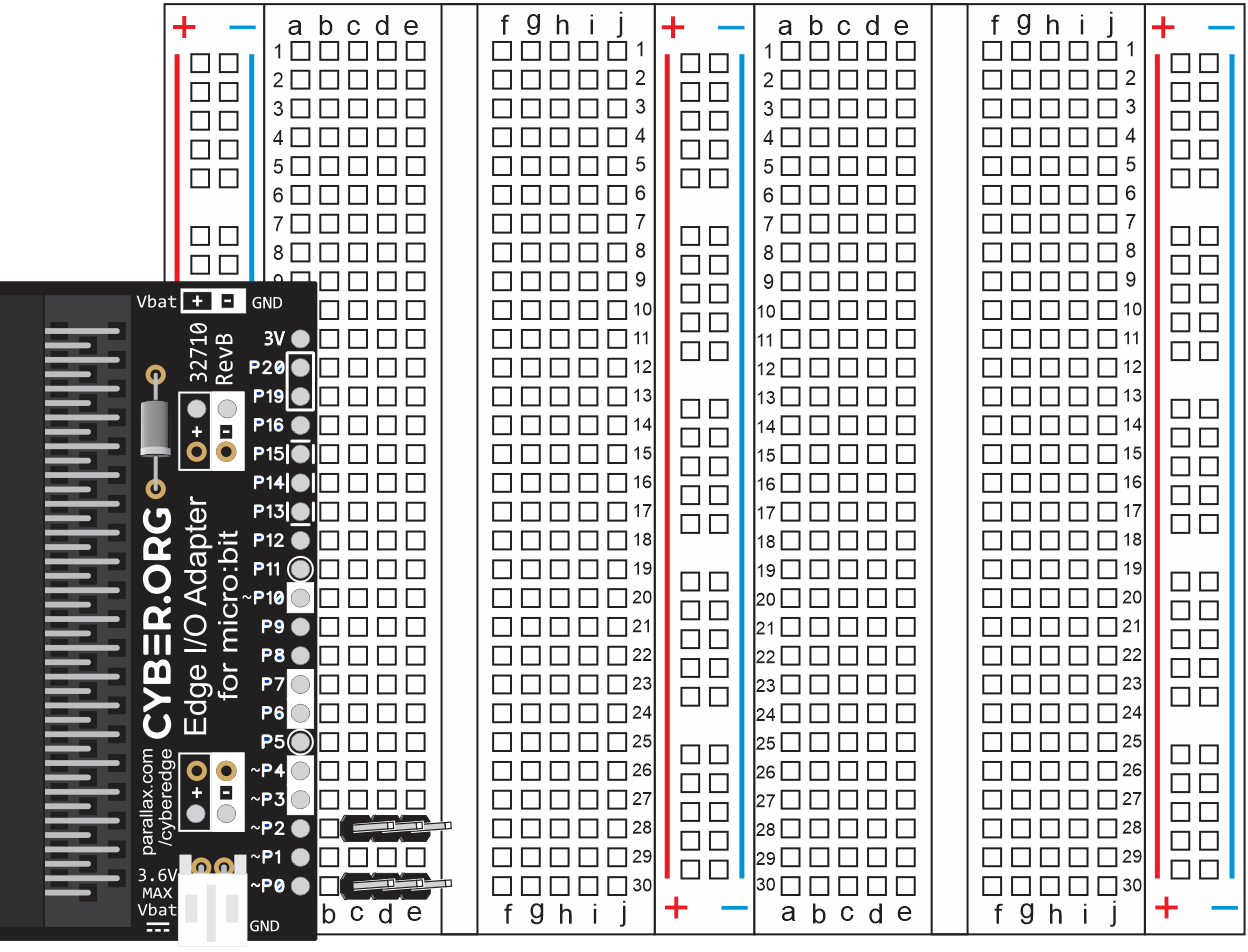
- Pick two sockets in the same row-of-five on one of the terminal strips. Circle them and label them ‘SR5’ in the drawing.
- Should they be connected?
- Test for continuity
- On one of the terminal strips, pick two sockets in the same row-of-ten, but on opposite sides of the valley in the middle of one of the terminal strips. Label the sockets ‘OSV’.
- Should they be connected?
- Test for continuity
- Repeat the previous setup, but with different rows, and this time, plug in a jumper wire to connect the two rows. Label the sockets ‘JOSV’.
- Should they be connected?
- Test for continuity
- In one of the bus strips, circle a socket in the (+) column and one in the (-) column, and label them PM.
- Should they be connected?
- Test for continuity
- Circle a socket in the (-) column of one bus strip, and another in another bus strip’s (-) column. Then, connect the two columns with a jumper wire. Label them NDCC.
- Should they be connected?
- Test for continuity