Dracula Prop Setup
Preparing the Servos
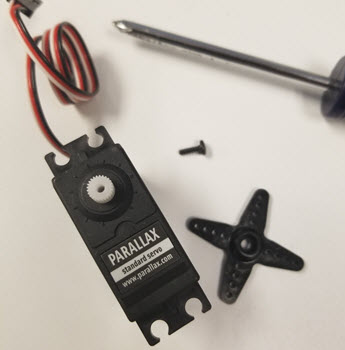
The type of servos I used are called Standard Servos. These are able to rotate a maximum of about 175 degrees and provide more than enough range of motion for this project.
- Gently move the servo horn clockwise until it will not turn anymore and then do the same in the counter clockwise direction.
- Take note of your servos’ approximate motion range. You will need to know this detail before permanently installing the servo onto the cardboard.
- Before mounting the servos onto the cardboard, you need to remove the servo horns. Using a Philips screw driver, remove the center screw holding the horn onto the servo and then pull the servo horn off to expose the spline. The spline is white colored part with gear teeth on the side that is exposed when the horn is removed.
Create the Mounting Surface
To anchor the servos, you will need a surface stronger than the felt material that the prop is made out of. The holes you will create are for the servo spline.
- Take some cardboard (or foamcore/styrofoam/etc) and cut out an outline to the body shape of your prop.
- Then using a Dremel or a drill, drill holes 0.25” in diameter near the pivot point of each limb.
For the sake of simplicity, I simply eye-balled the location for where the hole should go and started drilling. For better-looking results, you may want to do some measuring first.
Installing the Servos
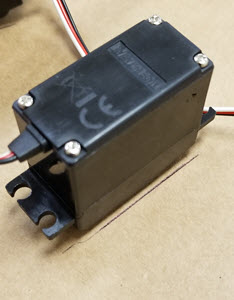
- Install the servos from the backside of your project. The spline should stick out on the “front” side of the project so you can attach your prop and the rest of the servo should be in the back, hidden.
- Then, reinstall the servo horn back onto the servo.
This should hold the servo onto the cardboard. The servo spline may not poke all the way through the cardboard but that’s ok because the servo horn should still be able to connect to the spline.
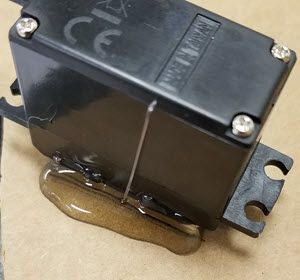
Remember to take into account the servos angle of motion so that you get the maximum range of motion for your project. Spend some time making sure it can perform the motion you want before anchoring the servo down permanently. You will likely need to loosen or remove the horn again to apply glue.
- Once you have decided what position you want your servo in, glue it down. I marked the position I wanted first, with pencil, then glued so I knew exactly where to apply the glue.
- Do the same for the remainder of your servos. (See pictures for an example of how I glued mine.)
Moving the Limbs
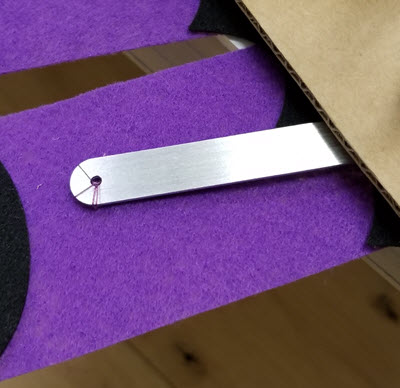
Each servo horn is too short to move a limb on its own. You can use popsicle sticks, pipe cleaners, or other makeshift items and glue them onto the servo horn so that the servo can reach further. I didn’t have popsicle sticks unfortunately, because somebody decided to eat ALL of the popsicles in the freezer here at Parallax.
There are no hard and fast rules to the arts and crafts part of this project. I used aluminum parts from one of our crawler kits but you can also use any type of item that you think will do the job.
- Using your makeshift servo extender arms, connect the limbs to the servos with glue or by tying them down with string.