Finishing Touches
Add Some Sound to the Movements
To add sound to your project, you’re going to need a couple of items. You will need a micro sd card and a speaker such as the one we carry in on our webstore (listed in parts section). You will also need to know how to place a .wav file onto the card.
- If you have SimpleIDE installed, follow the directions provided in the Play WAV Files tutorial here to load the wav file of your choice to your SD card.
- If you do not have SimpleIDE installed, you will need a microSD card/USB adapter you can plug into your computer to load in your wav file. See the tutorial above for filename limits and other restrictions.
Want to create or edit files of your own for use in this project? See our Sound Library reference guide for help.
- Once you have your file on the sd card, test it by plugging your speaker into the Activity Board’s audio jack and creating a small test program in Blockly using the AUDIO > Wav Files blocks.
For help using these blocks, see the Propeller BlocklyProp Block Reference section.
If you only want your file to play for a limited amount of time then add a 10000 millisecond pause block after the WAV play file block or whatever amount of time you choose, then add a WAV stop block right after. If you would like your file to play until the end don’t add a WAV stop block.
Motion Activation
The PIR from the Animation Kit is a great way to motion-activate your new project. It is simple to program and effective during the day or at night.
- Familiarize yourself with this sensor by trying the quick-start code in the Propeller BlocklyProp Block Reference.
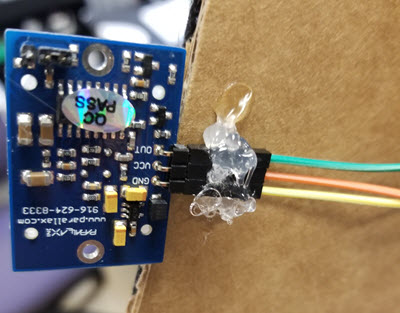
- Physically attach the PIR in a position where the lens faces the front of the prop so that people walking by can trigger it.
I plugged in my long jumper wires to the 3 pins on the sensor, then glued the black part of the cable connector to the backside of my project. If you are obscuring the pin connection markings, make sure you know which pins are for ground, power, and signal on your PIR before you glue it down or cover it in some way.
The Wiring
Now that the components are in place, it’s time to wire it up.
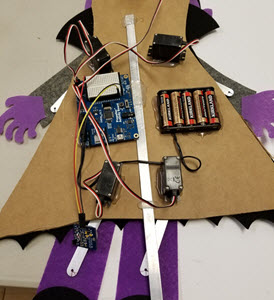
- Mount your Activity Board WX to the back. If you want to re-use your Activity Board, find a non-permanent solution that works for your project.
- Mount your battery pack.
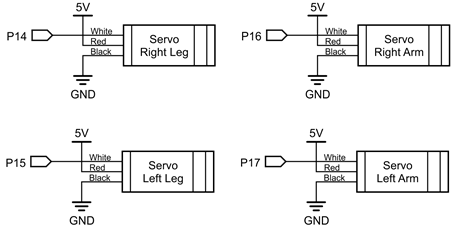
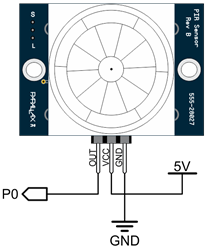
I used Servo Headers 14-17 for the arms and legs, and the other ends of the PIR jumper wires into PWR, GND, and P0.
- Follow the schematics below for proper connections and pin assignments according to my code.
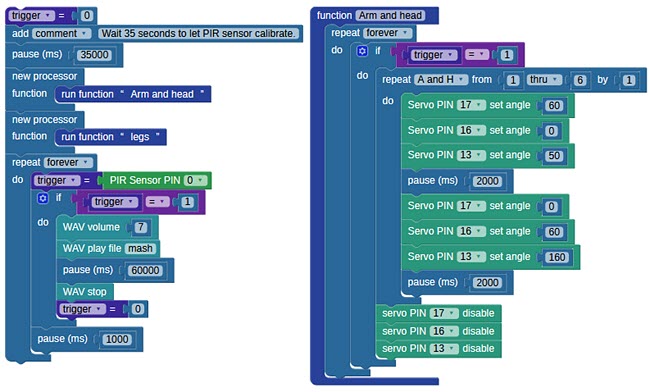
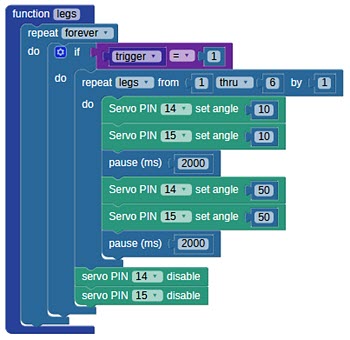
Note: My code has a servo assigned for head motion, but I did not use it in my project. You will likely need to modify the code for your own purposes.I wanted to make the prop insert into the soil of someone’s front yard, so I glued a metal rod down the center of the prop so that it lends itself to insertion into the ground. You can use a stick or whatever item you see fit.
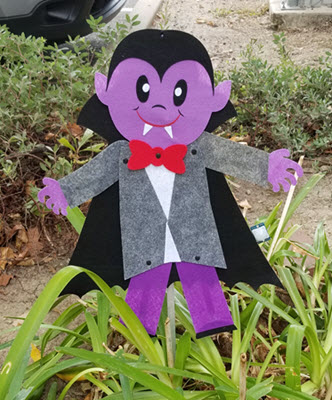
The key is not to make it too complicated. Simplicity is the best path for these kinds of projects because they are meant to be creative and fun. Use the pictures included in this project to make your project just like mine or to help make it your own.
Happy programming!