Projects that Print to Terminal
Recall from Using the Serial Monitor that you can flash a project to the micro:bit that prints a message, and open the Serial monitor to see that message. Makecode projects can also use serial write to display messages and values as the projects run. This can be helpful for displaying longer messages, and also for displaying what’s happening to values at certain points in your project. And, since you flash the project to the micro:bit, your code travels with your device.
In this activity, you will print messages, values, and combinations of both in the terminal.
Example project: print_to_terminal
- Connect your micro:bit module to your computer with its USB cable.
- In a browser, go to makecode.microbit.org to open the micro:bit Makecode Editor.
- Enter and name it print_to_terminal.
(See Save & Edit Projects.) - Click Download.
(See Flash Projects with MakeCode Editor.)
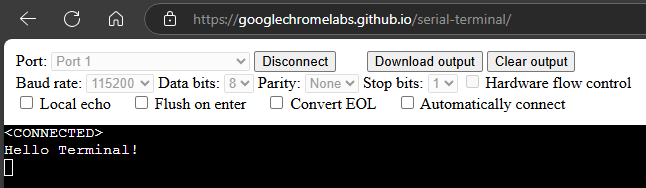
- Navigate to a new browser and open Google Chromelabs Serial Terminal
(See Use the Serial Monitor.) - Connect to your micro:bit using the connect button.
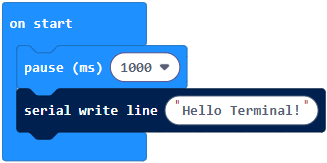
- Verify that the Hello Terminal! message is displayed.
- Want to see it again or nothing showed up?? Hit the reset button on the back of the micro:bit.
Pressing and releasing the micro:bit module’s Reset button, (which is next to its USB connector) restarts the project that’s currently flashed. After that, the micro:bit runs the project again and whenever it executes a serial write block, the result appears in the terminal. In this case, it’s the Hello Terminal! message.
Try This: Print Something Different
What if you want to display a different message in the online editor? Try modifying the text inside the serial write block.
- Change project’s name from print_to_terminal to print_to_terminal_try_this.
- Replace the Hello Terminal! with your own new message.
- Click the Download button.
- Check the results in the serial monitor.
Did You Know?
The micro:bit’s serial write block is completely different from the show blocks and its methods. One of those outputs is not as fast as the other. The show methods are for the 5×5 LED grid, and each block has to display each character long enough for a human to read it. In contrast, the micro:bit serial write block can send characters very rapidly, with each character taking only about 1/10,000th of a second to transmit.
Example project: display Integer Values
You might have noticed that serial write can display values stored by variables, along with strings of characters. That same functionality is also available when you add serial write blocks to projects.
- Enter and name the project print_value_to_terminal.
- Click the Download button.

- Check the results in the serial monitor.
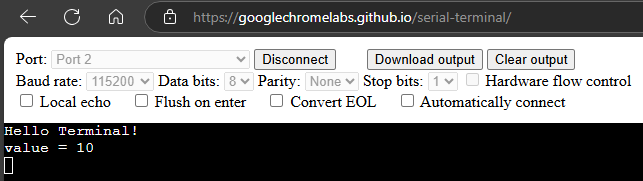
- Verify that the terminal displays Hello Terminal followed by value = 10 on the next line.
- If there are random missing letters ignore them, it’s not your program’s fault it’s the terminals.
Print Values to Terminal in a Loop
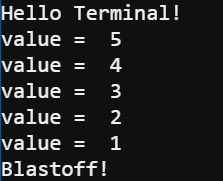
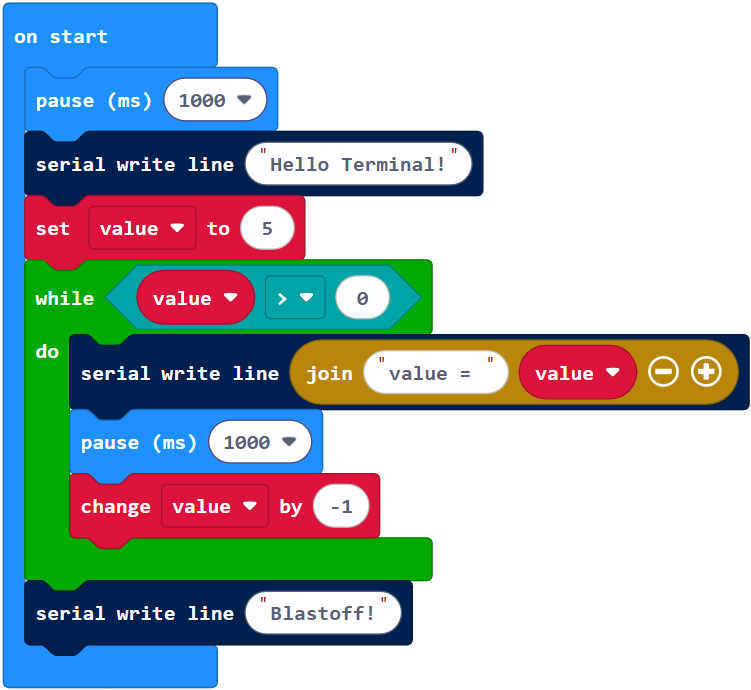
Let’s try a countdown timer in the terminal using a while loop. The while block repeatedly executes blocks that are indented immediately below it. The loop repeats “while” its condition is true. In this program, the while loop repeats while the value variable is greater than or equal to 0.
Example project: print_looped_terminal_values
- Enter and name the project print_looped_terminal_values.
- Click the Download button.
- Navigate to the serial monitor, if it’s not open go to Google Chromelabs Serial Terminal.
- Click Download.
- Verify that the terminal displays value = 5, value = 4, …value = 1, Blastoff!