Skip to content
Parallax Learn

Parallax Learn

  • Welcome
  • Tutorials
        • Tutorial Series head tag

          Tutorial Series
        • Tutorial Series

          The special, classroom-ready series pages are organized collections of tutorials for our most popular hardware and/or languages. The tutorials for each topic are conveniently accessible from a single page, shown in the order it is recommended that they be completed.
        • Robotics Series Head tag

          Robotics Series
        • Robotics Series

          • Artificial Intelligence
          • Cybersecurity: Radio Data tutorialCybersecurity
          • cyber:bot + Python
          • cyber:bot + MakeCode
          • Boe-Bot Tutorial SeriesBoe-Bot
          • Arduino Shield-Bot
          • ActivityBot with C TutorialsActivityBot + C
          • ActivityBot with BlocklyProp Tutorial SeriesActivityBot + BlocklyProp
          • Scribbler 3 Tutorial SeriesScribbler 3
        • Electronics & Programming Series Head tag

          Electronics & Programming Series
          • BS2 Board of Education Tutorial SeriesBS2 Board of Education
          • Propeller C-Language BasicsPropeller C Basics
          • FLiP Try-It Kit C Tutorial SeriesFLiP Try-It Kit + C
          • FLiP Try-It Kit BlocklyProp TutorialsFLiP Try-It Kit + BlocklyProp
          • Badge WX Tutorial SeriesBadge WX
          • Propeller BlocklyProp Basics and ProjectsPropeller BlocklyProp Basics
          • View All Tutorial Series »
        • Browse Tutorials
        • Browse Tutorials

          Individual tutorials sorted by robot or kit, and language.
        • By Robot or Kit
          • ActivityBot
          • SumoBot WX
          • Boe-Bot
          • Shield-Bot
          • cyber:bot
          • Badge WX
          • ELEV-8
          • ARLO
        • By Language
        • By Language

          • Propeller C
          • Arduino
          • BlocklyProp
          • PBASIC
          • Python
          • MakeCode
          • View All Tutorials »
  • Educators
  • Reference
  • Downloads
  • Home
  • All Courses

Tilt-Controlled Gripper with the cyber:bot Robot

Curriculum

  • 1 Section
  • 14 Lessons
  • Lifetime
Expand all sectionsCollapse all sections
  • Tilt-Controlled Gripper with the cyber:bot Robot
    14
    • 1.0
      Test and Tune the Gripper
    • 1.1
      Gripper Test Project
    • 1.2
      Troubleshooting your Gripper
    • 1.3
      How The Gripper Test Works
    • 1.4
      Automatic Open and Close
    • 1.5
      Go and Get an Object
    • 1.6
      Project and Tests
    • 1.7
      How The Test Project Works
    • 1.8
      Put the Object Back
    • 1.9
      Tilt Controlled cyber:bot with Gripper Control
    • 1.10
      Project for Tilt & Grip cyber:bot
    • 1.11
      Project for Tilt & Grip Controller
    • 1.12
      Test the Tilt-Controlled Gripper
    • 1.13
      Tune and Organize the Project Code

How The Gripper Test Works

How test_gripper_angles_buttons Works

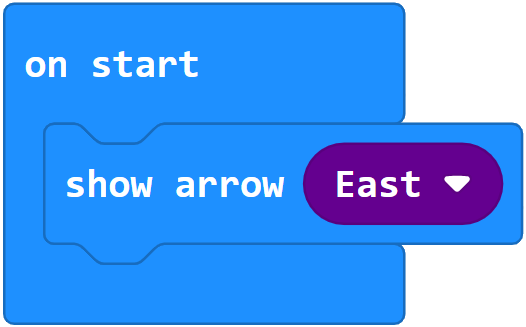
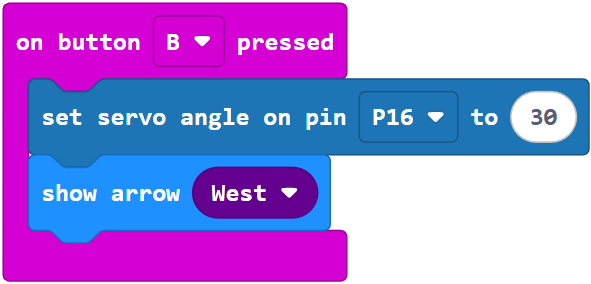
After adding the cyber:bot extension, the project uses show arrow (East) to point at the micro:bit module’s B button. 

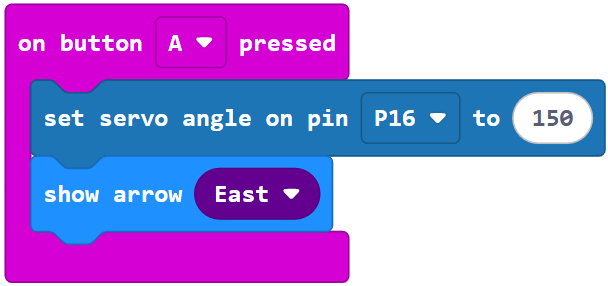
The main loop repeatedly checks if either the A or B buttons have been pressed. If the B button was pressed since the last time it checked, the bot(16).servo_angle(30) call closes and lifts the Gripper paddles. If the A button was pressed since the last time it checked, the bot(16).servo_angle(150) call lowers and opens the Gripper paddles. 

Both servo_angle calls can be considered “set it and forget it” so the servo will hold the position it was most recently set to. Whenever a particular button is pressed, the arrow is updated to point at the other button. 

Try This

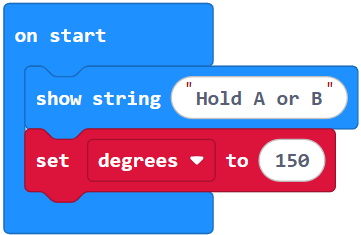
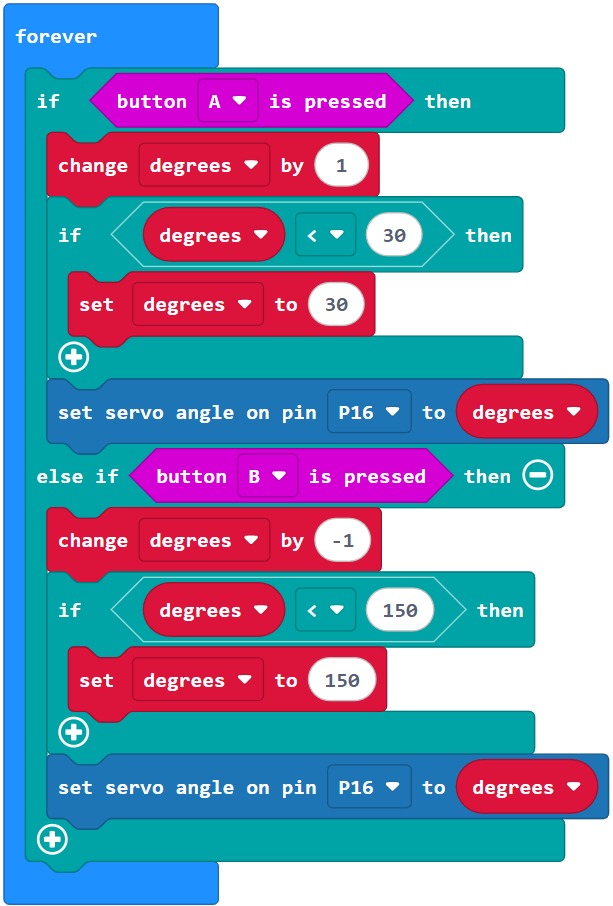
Some objects need to be lifted up and set down more carefully, like objects with narrower bases. Try modifying the test project to make the Gripper close-lift and lower-open more gradually. 

  • Set the project name to test_gripper_angles_buttons_try_this. 
  • Modify the project as shown below. 
  • Click Download.
  • Make sure the batteries and barrel plug are connected and that the cyber:bot board’s PWR switch is set to 2.
  • Test by holding the B button until the gripper goes all the way up, and then holding the A button until the gripper goes all the way down and opens.


Printer-friendly version
Troubleshooting your Gripper
Prev
Automatic Open and Close
Next

DISCUSSION FORUMS | PARALLAX INC. STORE

About | Terms of Use | Feedback: learn@parallax.com | Copyright©Parallax Inc. 2024

© 2026 Parallax Learn • Built with GeneratePress