In BlocklyProp, programs are often referred to as projects. You need to define the project’s attributes before you start coding.
Start a Project
In the toolbar, click New project, and this window will open:
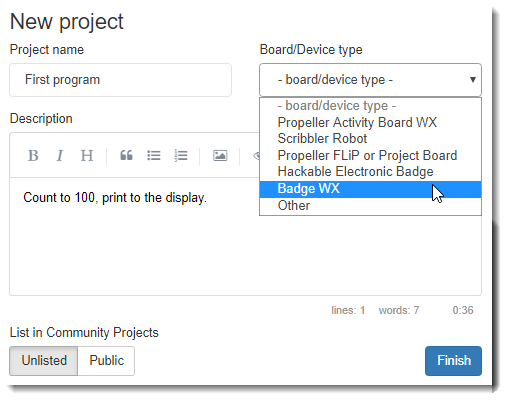
- Type in a Project name (required) and a Description of your project (optional, but a good practice).
- Click on the Board/Device type drop-down menu, and then select Badge WX.
- If you are over the age of 13, you will have the option to choose a Community Projects setting. (You can change this option later.)
- Unlisted: the project won't be shown on the Community Projects list, but will appear in your "My Projects" list when you are logged into your BlocklyProp account.
- Public: the project can be seen and cloned by anyone by clicking on Community Projects.
- When you’ve made your selection, click Finish.
Build your code
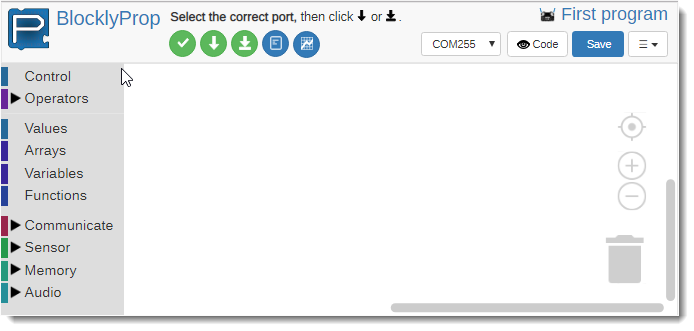
The BlocklyProp workspace starts out blank. To the left of the workspace is a category menu of BlocklyProp blocks (note that these are updated periodically). Clicking items with an arrow will open a sub-category menu.
To build a program, you will click, drag, and drop these blocks into your workspace in the order they need to run. Blocks placed near each other that are meant to fit together will snap into place with an audible click. You can click, drag, and drop to separate them again if needed. Many blocks have entry fields and drop-down menus you will use to choose how the blocks behave. Some blocks are designed to fit inside other blocks and work together.
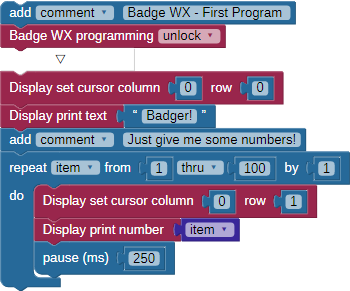
- Click the block menu and find the blocks to build the program shown below.
- When you are done building the code, click the Save button (near the top left).
Unlock your Badge
Your Badge WX is locked to prevent programming each time the power is cycled off and turned back on. This is to prevent hackers from causing mischief. To start programming your Badge WX, you must manually unlock it first. There are two ways to unlock the Badge WX using its buttons, 1) persistent unlock, and 2) one-time temporary unlock.
Persistent unlock (recommended)
This method will keep the Badge WX unlocked for programming until you turn it off and back on, or until you use a Badge WX Programming Lock block.
- With the Badge WX powered on, press & release the On/Off button six times swiftly (within 2 seconds).
- The PWR LED will blink six times quickly, indicating that badge is unlocked.
One-Time temporary unlock
After power-up and connection to a Wi-Fi Access Point, the Badge displays the "Connected!" message, as yours should now.
- Press & release the right rocker button to select the Load option.
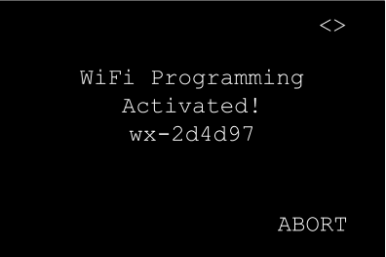
The Badge WX will display the "WiFi Programming activated" screen. The Badge WX can now be programmed, but will lock again automatically a few seconds after you run your code. Further download attempts will fail since the Badge WX was only unlocked for a single download.
Run your Code
- First, select the port that is connected to your Badge WX
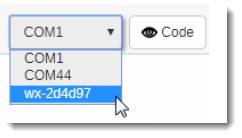
- Next, review the two options for running your code:
 Run Once (load code to RAM)
- The green arrow loads the program to the Propeller chip's RAM—Random Access Memory.
- It is volatile memory, meaning it will be erased if the Badge WX is shut off or the Propeller is reset.
- If your code has an Unlock block, like in this example, you will be able to reprogram it no matter how you unlocked it, as long as you don't turn off Badge power.
- If you want to be able to run your program after you turn Badge power off and on, use the Load and Run option below.
 Load and Run (save code to EEPROM):
- The green underlined arrow loads the program to EEPROM—Electrically Erasable Programmable Read-Only Memory.
- The EEPROM memory chip on the Activity Board WX is non-volatile, so programs will remain in your Badge WX EEPROM memory even after it has been turned off or reset.
- If you have an Unlock block in your saved code, you can re-run the code from the Badge's menu after turning it off and on, and this will also unlock it for programming.
- If you have a Lock block in your saved code, after a Badge power cycle, you will need to unlock it before re-programming.
- Run your code with one of the options above.
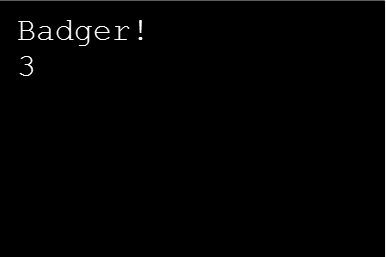
This First Program example code displays data on the Badge's OLED screen, first the word " Badger!" and then numbers counting from 1 to 100. If it hadn't displayed data, the screen would still show whatever was on it before the code download, such as the "Connected!" or "WiFi Programming Activated!" message, depending on how you unlocked it. So, it is a good idea for your projects to include some sort of OLED message, even if it is just "Done!" so you know your code did run.
