The PixyMon software is used to teach the Pixy2 to recognize up to seven color signatures. PixyMon also provides a view from the Pixy2’s camera. Settings for communication baud rate, color correction and other modes of operation need to be configured. The Pixy2 can also be taught color signatures without PixyMon using the white button, but we’ve found this method to be difficult to verify and less reliable in general.
Download and Install PixyMon
Visit the Pixy2 Downloads and install PixyMon for your operating system. You can also find FAQs, troubleshooting guides, and much more are available on the Pixy2 Wiki.
Connect Pixy2 to Computer and Run PixyMon Software
The following steps are also shown in this video.
- Connect the Pixy2 to your computer’s USB port using Power Supply Setup (A) pictured earlier.
- Make sure the Propeller Activity Board’s 5V is NOT CONNECTED to the Pixy2.
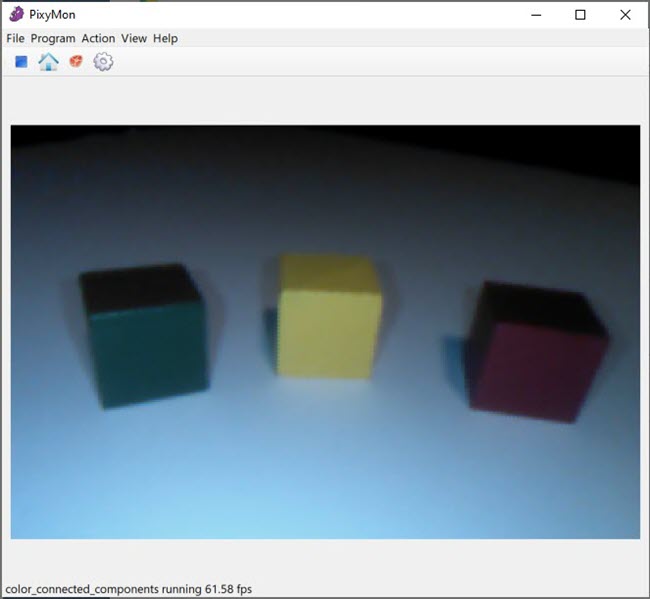
- Place some colored objects in front of your ActivityBot 360 and run PixyMon.
You’ll see your colored objects through the PixyMon viewer:
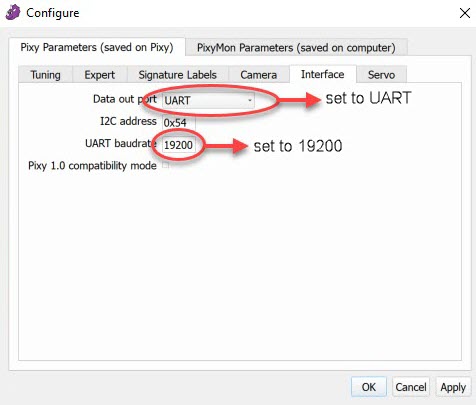
- Click File and select Configure and the Interface tab.
- Change the Data out port setting from “Arduino” to “UART”.
- Set the UART baudrate to 19200. Click Apply and then Ok.
Restore default parameters (under File menu). As you become familiar with PixyMon software you will find yourself tuning colors for your environment’s lighting and background, sometimes moving your robot from place to place - especially to demonstrate to others. It can be fastest to restore the default parameters and reteach the color signatures in your new environment. When do this, you’ll also have to configure the Data out port and UART baudrate settings again, as shown above. These settings are necessary for our example code.
- Set signatures 1, 2, and 3 for the colored blocks. With three different colored blocks, set three signatures (for three objects of the same color, set one signature and verify the remaining two are “seen” with the same signature).
- Click Action / Set Signature 1. Select the area you wish to identify as Signature 1. Signature 1 is the green block in this example.
- Click Action / Set Signature 2. Select the area you wish to identify as Signature 2. Signature 2 is the yellow block in this example.
- Click Action / Set Signature 3. Select the area you wish to identify as Signature 3. Signature 3 is the red block in this example.
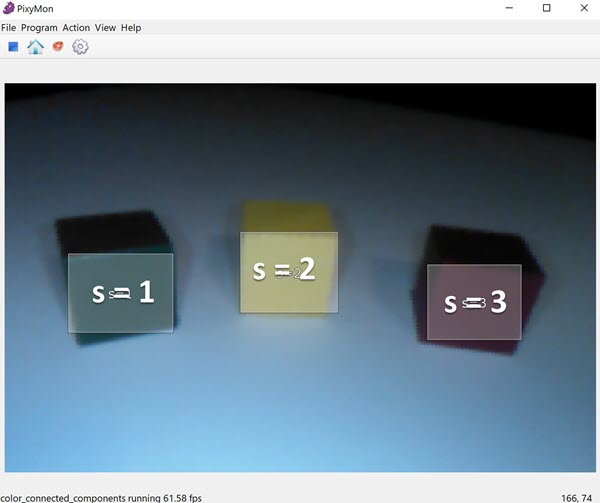
PixyMon should now show the color signature number of each unique block color with an outline and a label:
Getting the perfect color signature matches isn’t easy but you can modify the environment to improve your ability to get quality color signature matches. Try these things:
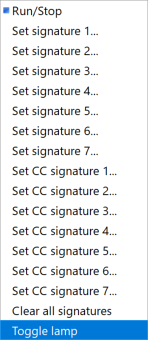
- Select Action / Clear All Signatures to start over
- Select Action / Toggle Lamp if you need to turn the LED light on. Natural light and white backgrounds will also affect your success, changing the color hues.
- Clear background objects you don’t wish to attach to a signature, else they’ll be seen by the ActivityBot 360° and make coding far more difficult.
The Toggle lamp feature is perhaps the single most important option for setting color signatures. If you set your color signatures with the LED lamp ON, then you will also need to turn it ON in the BlocklyProp example Pixy2TerminalDisplay.svg code. The default code example has the LED in the OFF state.
Through experimentation we’ve found the LED lamp should be set ON when there’s no natural light or the room is dark. The LED lamp can usually be OFF when natural lighting exists. Experiment!
Additional controls including white balance and color ranges are also accessible through PixyMon’s configure menu, documented on the Teach Pixy an Object wiki. We’ve found that while the many configurations allow for more precise results they are also not necessary for basic success and functionality. Also see the Tips on Improving Detection Accuracy wiki.