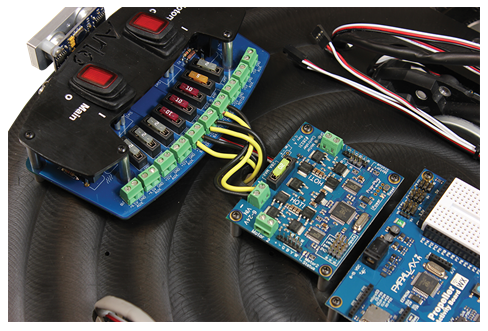
Step 35 – Wire PDB to Battery
It’s now time to connect both sets of battery wires to their respective terminals.
Remember that these two sets of battery wires are already connected to the batteries. While you’re working with them, so be sure to not cause any short circuits – we don’t want to arc-weld any robot parts in this project!
- Remove the tape covering one BLACK wire end. Keep it from touching any conductive surfaces or objects.
- Insert the BLACK battery wire into the one of the two GND connections on one of the two BATTERY labeled terminal blocks, and tighten with the small flat-blade screwdriver.
- Remove the tape covering the remaining BLACK wire end. Keep it from touching any conductive surfaces or objects.
- Insert the second BLACK battery wire into the other GND connection on the second BATTERY labeled terminal block, and tighten with the small flat-blade screwdriver.
- Next, make sure that both switches are in the OFF position.
- Remove the tape covering one YELLOW wire end. Keep it from touching any conductive surfaces or objects.
- Insert ONE yellow wire end into one of the two “+12” battery terminals. Tighten as before.
- Remove the tape covering the other YELLOW wire end. Keep it from touching any conductive surfaces or objects.
- Insert the remaining YELLOW wire end into the other “+12” battery terminal. Tighten as before.
Since we’re working with stranded wires, make sure these connections are solid and that there are no little tiny wires that aren’t totally contained within the terminal screw cavity.
Important Tip: SLA batteries can permanently lose functionality if allowed to remain discharged or in a low-charge state for an extended period of time. It is important that SLA batteries be completely charged periodically to prevent this. We strongly recommend that you fully charge your Arlo batteries at least once per month, even when the robot is not in use.