IMPORTANT! IF YOU PURCHASED YOUR ELEV-8 V3 KIT AFTER FEBRUARY 2016 AND/OR HAVE MOTORS WITH TWO (2) SET SCREWS – SKIP THIS STEP AND GO TO STEP 2: ATTACH MOTORS TO MOTOR MOUNTS.
For users with V3 kits purchased before February 2016, and/or users with motors that have only one (1) set screw, please complete this step. Here you will apply Loctite® to the motor set screws to prevent them from loosening during flight and potentially causing equipment failure.
Tools Needed:
- Paper Towels or other disposable work surface/wipes
- 1.5 mm Hex Key
Parts Needed:
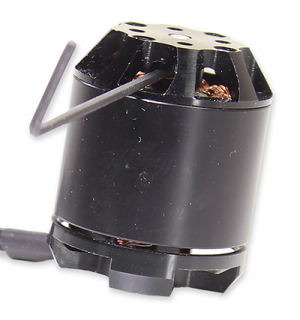
- 4 – KEDA 1000kV Outrunner Motor (#750-90010)
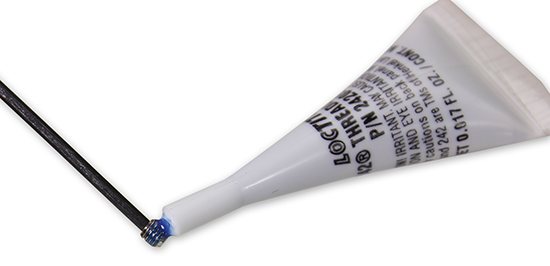
- 1 – Loctite® Threadlocker Blue 242® (#700-00106)
Instructions:
-
Using the hex key, carefully remove the motor set screw from each motor. The screws may be very tight; be careful not to break your hex key.
Tip! To open the Loctite® twist off the cap. When you are done, use the other end of the cap to seal the Loctite®, you'll need it a few more times in the assembly process.
- For each motor, apply a small amount of Loctite® to the set screw threads and carefully reinstall the screws. Seat each screw firmly but do not over-tighten. Work over a paper towel or other disposable work surface for easy cleanup! If your motors have two set screws, remove and Loctite® the second set screw only after reinstalling the first one.
3. Allow the Loctite® to set for 10 minutes; it will fully cure in 24 hours.