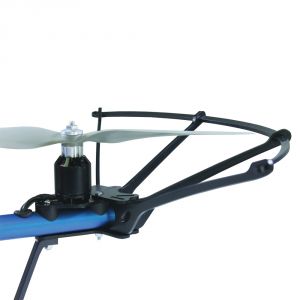
Now you will be fastening the motor mounts to the booms and attaching one side of the landing gear.
Tools Needed:
- #1 Philips Head Screwdriver
- Parallax Combination Wrench (#700-10025)
Parts Needed:
- 4 – Motor/Mount/Boom Assemblies, prepared in Step 3
- 4 – Landing Gear (#721-80007)
- 8 – Saddle Washer, 3/4" (#712-00010)
- 8– Locknut, #4-40
- 4 – Machine Screw, #4-40 x 1 1/2"*
- 4 – Machine Screw, #4-40 x 1 1/4”*
- 8 - Nylon Spacer, #4 x 1/8" Length
- 4 - Flat Washer, #4
- 1 - ELEV-8 v3 Prop Guard Kit (#80310) - optional but recommended; included with 80300 starting April 2018 and available separately here.
*When determinig which machine screw to use, use the screws with a length that is equal to or just shorter than the length listed. Industry standard tolerance for machine screws allows them to be up to 1/16" shorter than their numerical size.
Instructions:
Before you begin, view the ELEV-8 Prop Guard Kit tutorial videos, and decide whether you will add this accessory to your quadcopter. It is highly recommended to help reduce repairs and property damage if you are learning to fly. If yes, then assemble each section according to the video, and attach to each boom as you proceed from Step 3 below, but using the longer screws provided with the Prop Guard kit.
- Feed a #4-40 x 1 1/2” screw through the hole on the motor mount next to to where the wires come out of the motor. Feed a #4-40 x 1 1/4” screw through the hole on the opposite end of the motor mount.
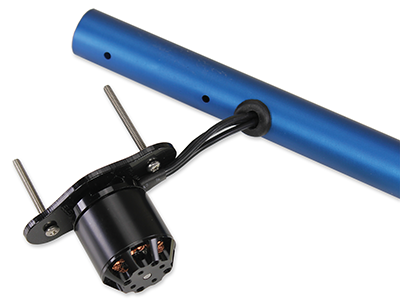
- Slide a nylon spacer and saddle washer over the other end of each screw.
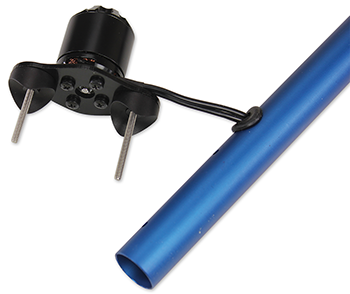
- Insert the screws into the holes on the boom, and feed it through to the other side.
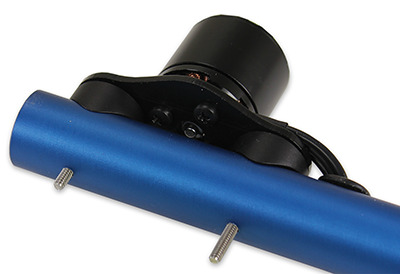
- Take the short side of the landing gear (see the last image on this page) and feed it over the screw next to the motor wires, followed by the locknut.
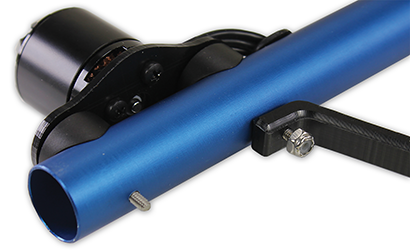
- Place a washer over the other screw, followed by a locknut.
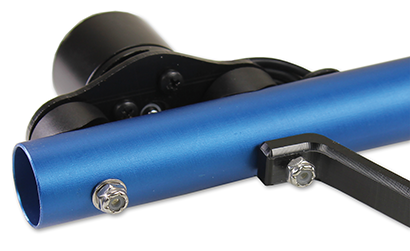
- Using the screwdriver and wrench, tighten (clockwise) until there is no longer a gap between any parts (including nut or screw-head). Then turn the locknut one more full rotation and stop. Do not turn more than this or you may begin to crush the boom.
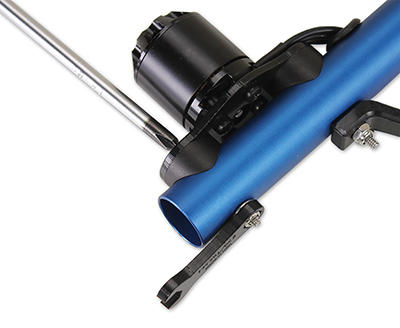
- Repeat for the other three booms.
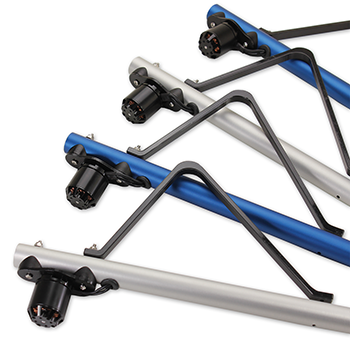
If you elected to use the Prop Guard Kit, each boom will instead look like this:
