In the last tutorial, you tested out a simple S3 driving program. In this tutorial, we will expand our remote control possibilities. By utilizing more buttons for more possible maneuvers you can fine-tune your robot's motion.
Remember that if you haven’t recorded the IR Remote button code for a particular button, take a quick run through the main program in the Test the Receiver and Remote tutorial and write down your results.
Advanced Driving
- Start a new program in BlocklyProp and snap together the Advanced Driving Code shown below:
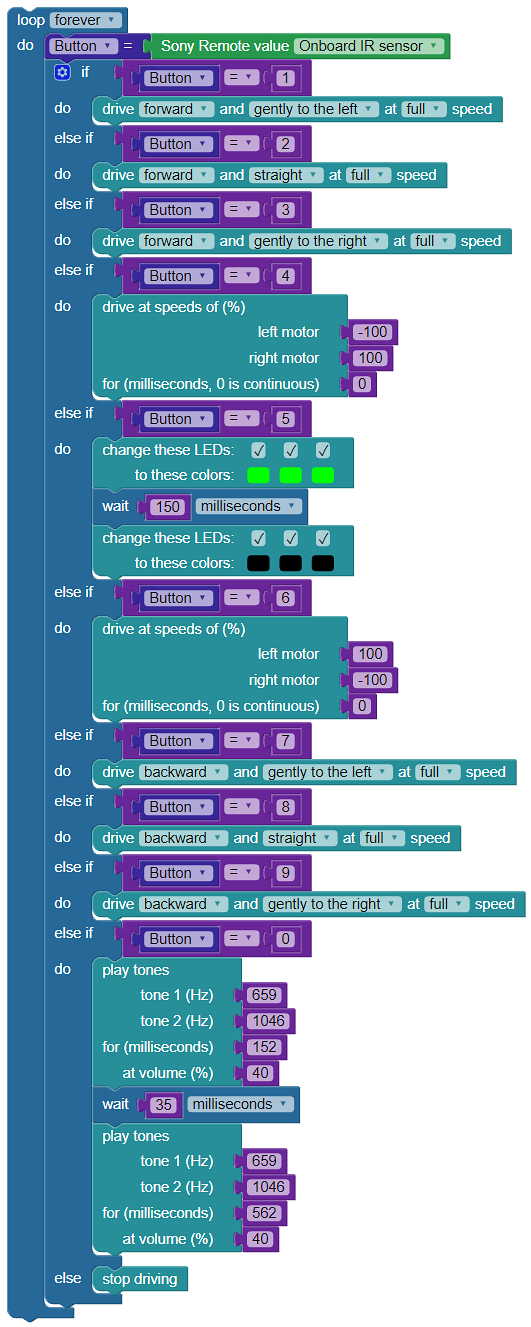
The code you’ve written should drive the S3 (or control the LEDs and speaker) using buttons 1 - 9, and 0. The S3 will move (or activate a device) only while a particular button is pressed and should stop when it is released.
- Save, compile, and load the program to EEPROM on your S3 and give this more advanced program a try.
The list below reflects which button on your remote controls each motion or device. Note that these button maps are assigned assuming you're using a Parallax Brightstar remote.
- 1 - Turn Forward Left
- 2 - Forward Straight
- 3 - Turn Forward Right
- 4 - Rotate CCW
- 5 - Blink 3 LEDs
- 6 - Rotate CW
- 7 - Turn Backward Left
- 8 - Backward Straight
- 9 - Turn Backward Right
- 0 - Play Ta Da! Sound
Does it work the way you thought it would and does it function properly? If not, do a little “debugging” of your code.
Your Turn
- Modify the code so that the S3 continues to drive even when the button is not pressed, and make button 5 a stop driving function instead of flashing the LEDs.
- Save, compile, and load the program to EEPROM.
Make sure it works the way you thought it would and functions correctly. Did everything work as you expected? If not, find the errors and correct them.