Put the safety glasses on immediately! The Gripper has small parts, including a torsion spring which may be inadvertently released during assembly.
- Unplug and temporarily remove the robot’s battery pack.
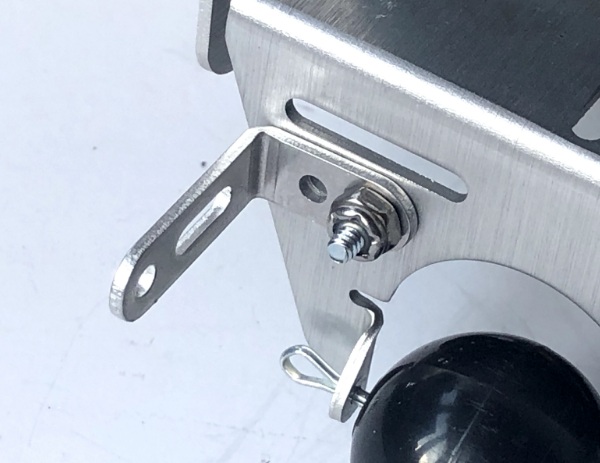
- Using a 4-40 ⅜” panhead screw and a 4-40 Nylon lock nut, attach the Universal “L” bracket to the back left side of the robot chassis as shown here.
- Replace the battery pack when finished.
- Remove the battery plug from the robot’s power jack.
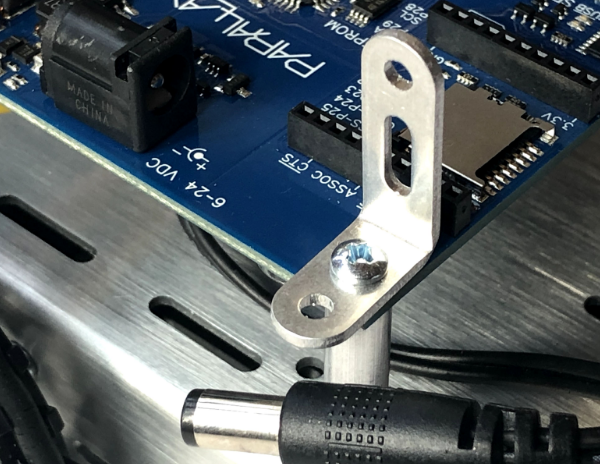
- Remove the screw that secures the back left corner of the board to the standoff.
- Attach a Universal “L” bracket as shown using the screw.
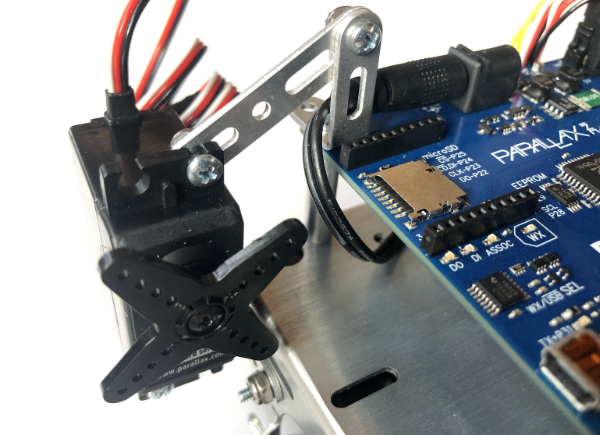
- Using (3) 4-40 ⅜” panhead screws, (3) Nylon locknuts and a straight bracket, attach the top and bottom servo flanges to both brackets.