How the pushbutton_test_x2 Script Works
The pushbutton_test_x2 script started as pushbutton_test, and was adapted for two pushbuttons through the following changes:
- The state variable was replaced by state9 and state6.
- The pin6.set_pull(pin6.NO_PULL) call was repeated for pin 9: pin9.set_pull(pin9.NO_PULL).
- The single state = pin6.read_digital() statement was replaced with two new versions, one for state6 and pin6, and the other for state9 and pin9.
- The print statement was expanded so that it shows values for both state9 and state6.
Try This
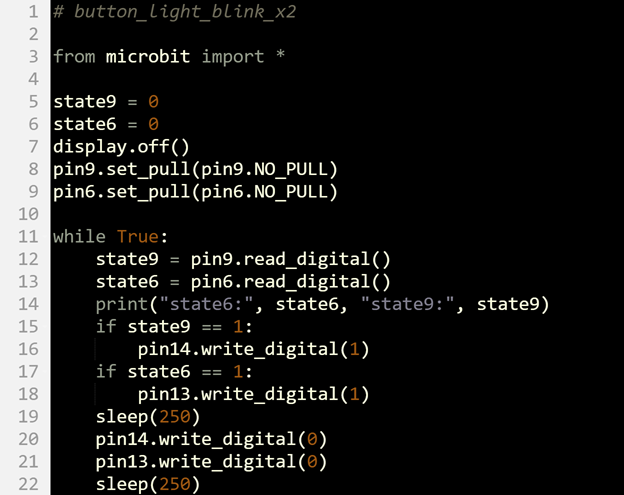
The button_light_blink_x2 script is the two-button, two-light version of the button_light_blink script from the Build and Test a Pushbutton activity’s Your Turn section.
- Enter the button_light_blink_x2 script into the micro:bit Python Editor.
- Set the project name field to button_light_blink_x2, then click Save.
- Click Send to micro:bit.
- Verify that the green light connected to P13 stays off when the button connected to P6 is not pressed.
- Press and hold the button. Verify that the P13 light blinks while the P6 pushbutton is held down.
- Repeat with the test for control of the P14 light with the P9 pushbutton.