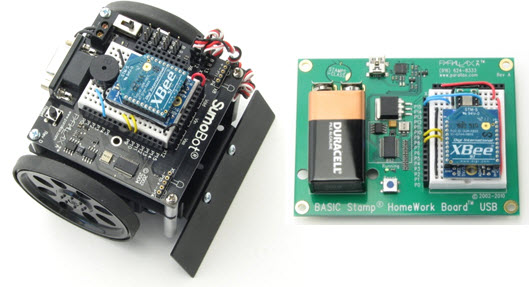
Connect a Memsic 2-axis accelerometer and XBee RF module to the BASIC Stamp HomeWork board and load some code, and you've got a wireless tilt controller. Connect a second XBee RF module to a BASIC Stamp SumoBot board (or Boe-Bot) and load some code into that, and you've got a tilt controlled robot! Since XBee modules can be configured to pair off in different networks, and even on different radio frequencies, you can have multiple pairs of wireless tilt controlled Boe-Bot or SumoBot robots in the same room without any radio interference or crosstalk.
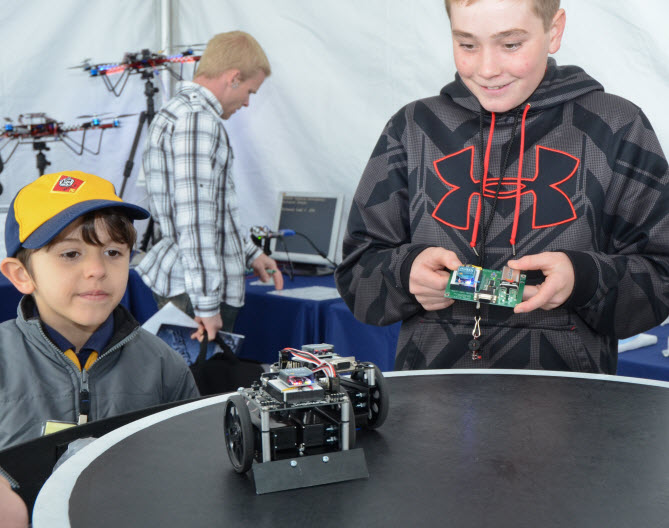
SumoBot wrestling at the 2012 Parallax Robotics & Microcontroller Expo, using XBee + Memsic wireless robot controllers. Photo courtesy: ©2012 Rich Harman.


Want to make a tilt controlled Boe-Bot robot instead? No problem, the SumoBot circuit works great on the Boe-Bot robot too.
What's Needed
For each wireless tilt controller + robot, you will need:
- (1) BASIC Stamp HomeWork Board (#555-28188) and a 9 V battery
- (1) Memsic2125 Dual-Axis Accelerometer (#28017)
- (2) XBee modules with PCB antenna (#32416)
- (2) XBee adapters:
- XBee 5/3.3V adapters (#32401) require soldering, and are best for SumoBot applications
- OR - - XBee SIP adapters (#32402) need no soldering, and save breadboard space
- XBee 5/3.3V adapters (#32401) require soldering, and are best for SumoBot applications
- (1) of these BASIC Stamp robots, fully assembled and tested
- Boe-Bot Robot (#28132 or #28832)
- OR - - SumoBot Robot (#27400, or #27402 for a pair)
- Boe-Bot Robot (#28132 or #28832)
- (1) Piezospeaker (included with the Boe-Bot and SumoBot kits)
- (2) Stickers you can write on, and a pen
- Misc. jumper wires
Getting Started
- Download Tilt Controlled SumoBots BS2 Code
- Build, test, and get familiar with your BASIC Stamp controlled robot:
- For a Boe-Bot, complete at least chapters 1-4 in Robotics with the Boe-Bot (#28125).
- For a SumoBot, complete at least the SumoBot assembly manual (#122-27400) chapters 1 and 2.
