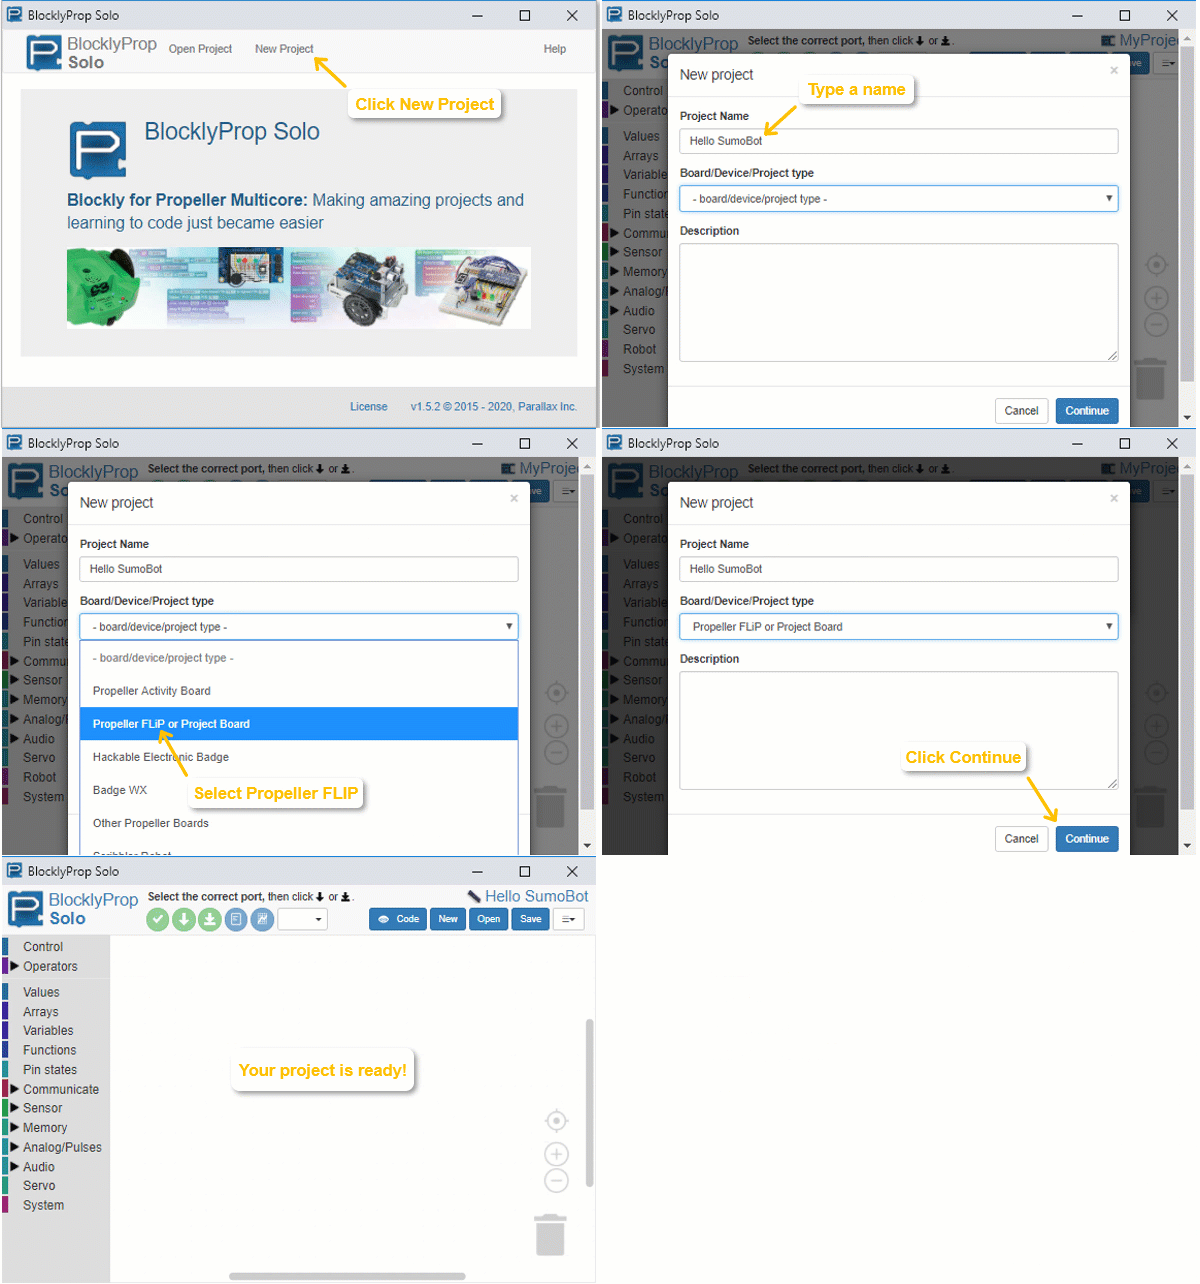
BlocklyProp programming starts by creating a project. Each project you make needs a name, and also needs to know which type of Propeller board is going to run the program. For the SumoBot WX, that’s the Propeller FLiP module. Let's try it.
Create a New Project
- Click New Project.
- Click the Project Name field and type in a name. Let’s use Hello SumoBot.
- Click the Board type dropdown and select Propeller FLiP.
- Click Continue.

Build the Code
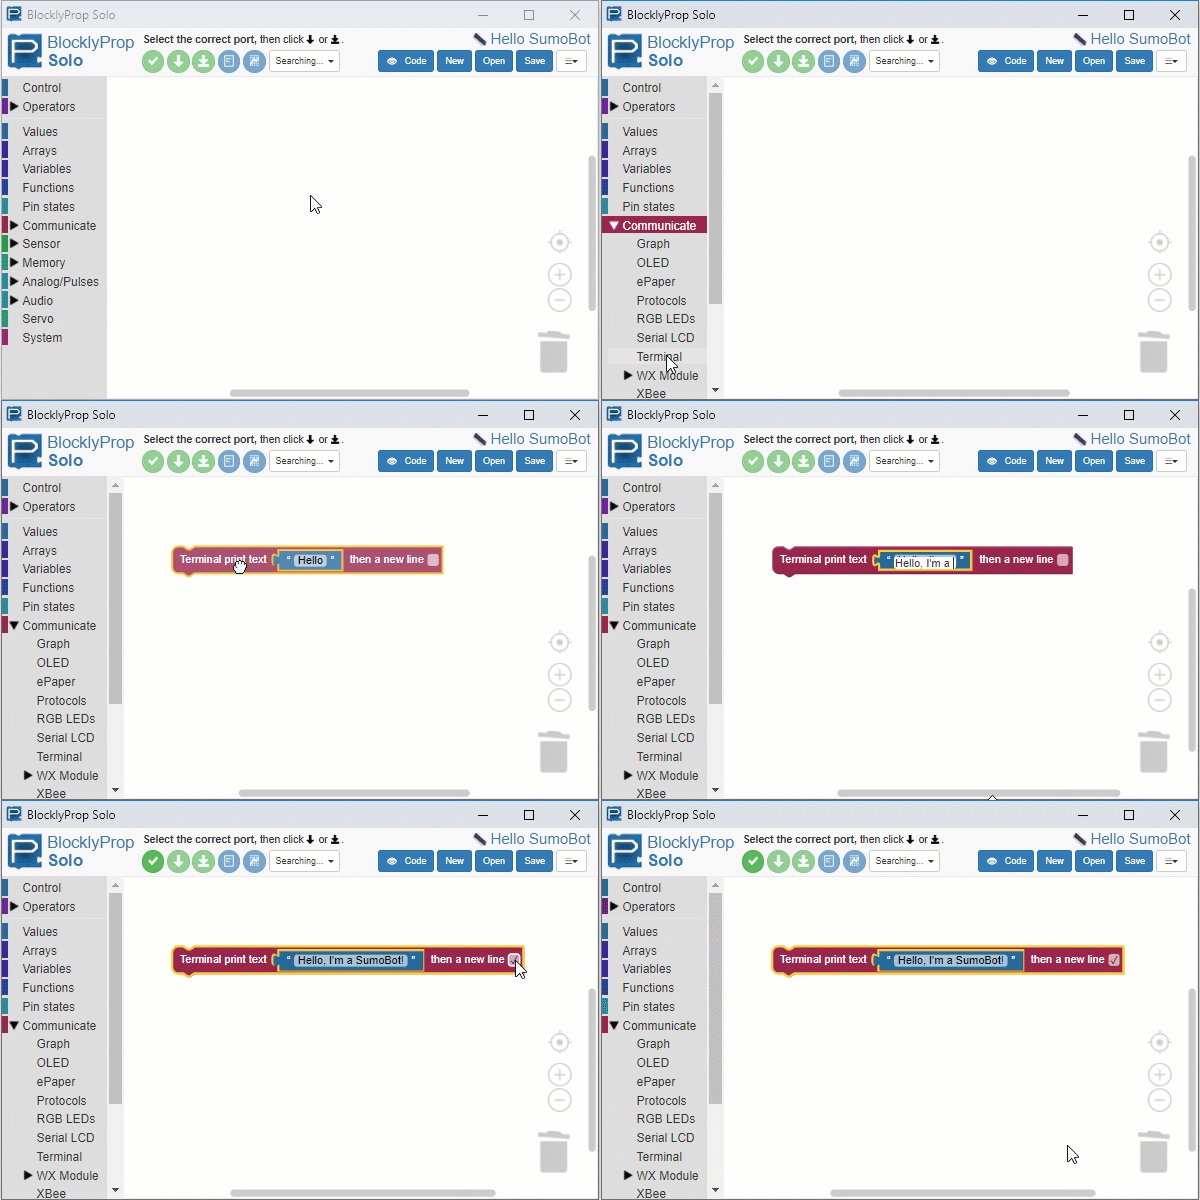
BlocklyProp programs are built by placing one or more blocks in the white canvas area of the Edit Pane. For a first program, let’s try making the Propeller FLiP send the text “Hello, I’m a SumoBot” BlocklyProp's terminal.
- In the left-side menu, click the Communicate block category.
- Click the Terminal subcategory.
- Click the Terminal Print text “Hello” block to place it on the canvas. Once a block is on the canvas, you can click, drag, and drop it to move it around.
- To customize the message, click inside the block with the Hello text and type your own message.
- If you like, click the new line checkbox. When the message is displayed, it moves the cursor to the next line. It's useful if you want to display more than one message.
- Click Save and then save your Hello SumoBot.svg file to your computer. It is ready to run now, and you can also open it later.

