Ohmmeter Script
- Right-click ohmmeter_cyberscope.hex (below), and choose Save Link As...to download.
- Click the micro:bit Python Editor's Open button, then select and open ohmmeter_cyberscope.hex.
- Click Send to micro:bit.
- Click the three vertical dots ⋮ by the Send to micro:bit button, and select Disconnect.
- Start the CYBERscope:
- In a different browser tab, go to cyberscope.parallax.com.
- Click the CYBERscope's Connect button.
- In the serial port dialog, select the port with mbed in its name, and then click Connect.
Ohmmeter Tests
Individual resistors need to be removed from the circuit to be measured by an ohmmeter. Keep this in mind as you follow the instructions.
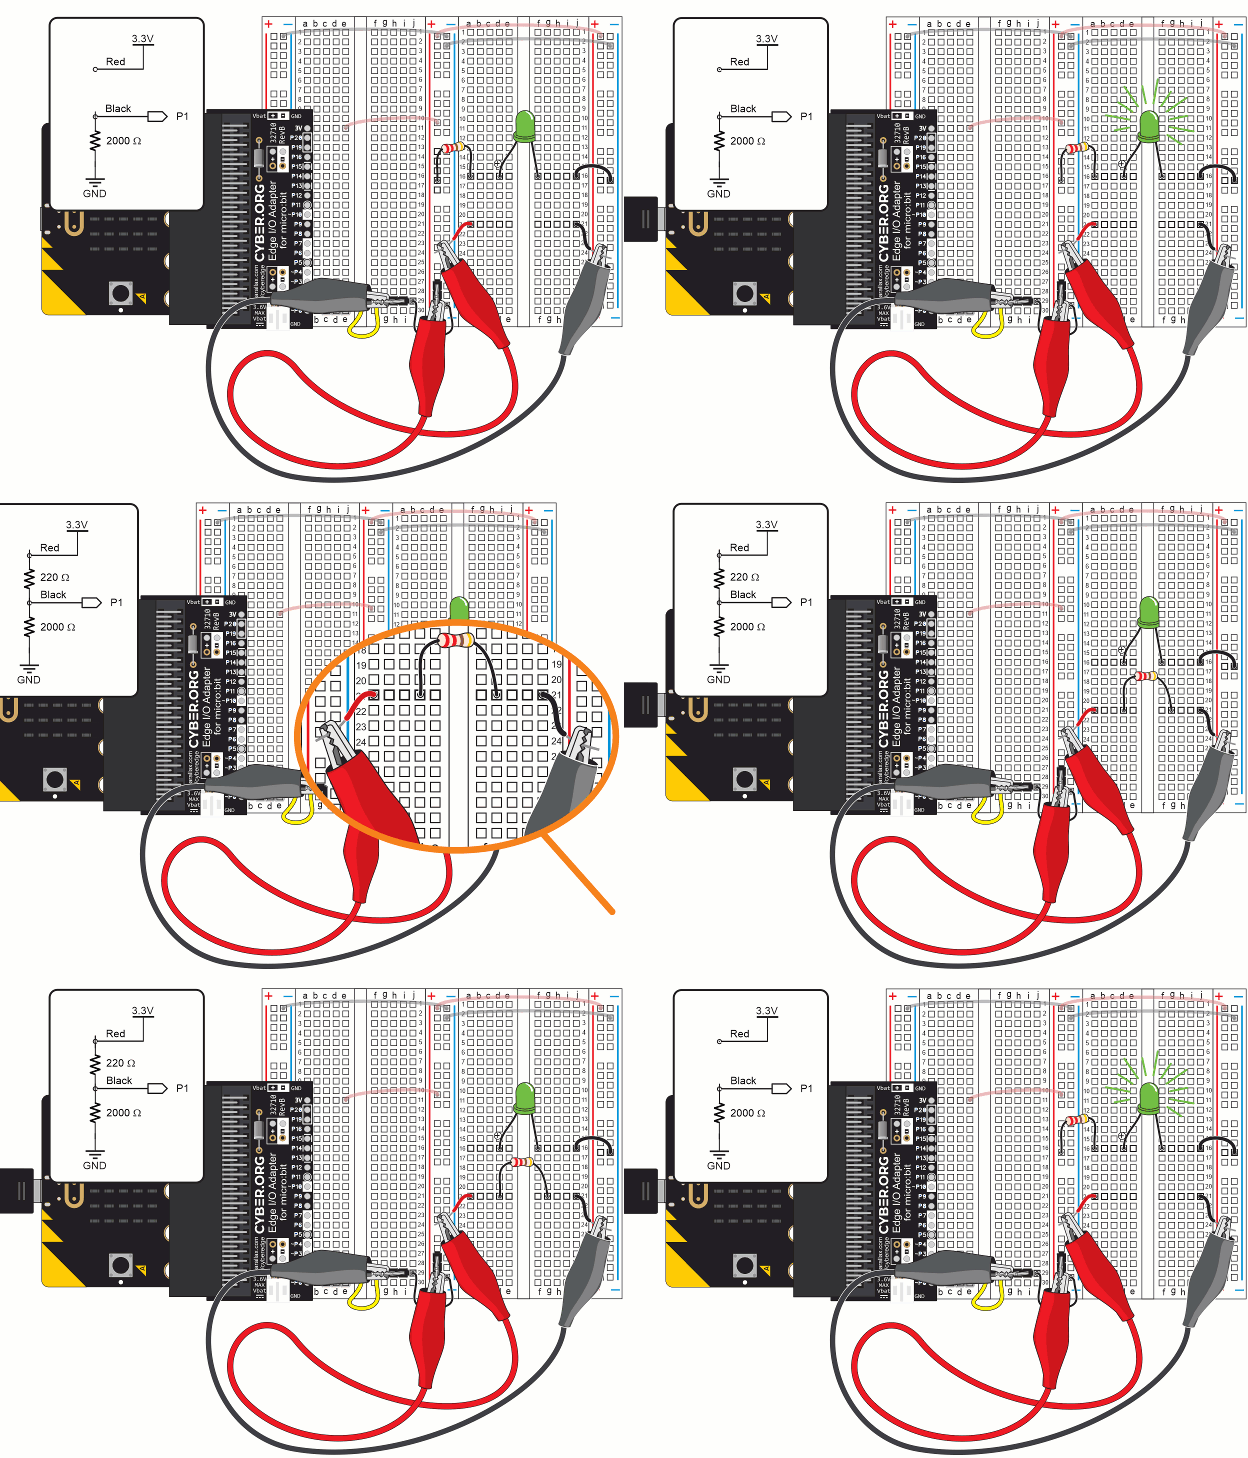
- Use the animation and the instructions below it to measure the 220 Ω resistor with your micro:bit ohmmeter.
- Optionally, view the full-size measure-resistance-220-from-led-circuit.mp4 clip to play and pause it between steps.

- Remove the 220 Ω resistor from the LED circuit.
- Plug the 220 Ω resistor’s leads into the rows with the positive and negative probes. Example: (d, 21) and (g, 21)
- Go to cyberscope.parallax.com, and click Connect.
- The CYBERscope should automatically start displaying resistance measurements. If it doesn't, try clicking the Device dropdown and selecting Ohmmeter.
- Resistance measurements should start displaying after a second or two.
- Verify that the measurement is somewhere in the 209 to 231 Ω range.
- Remove the 220 Ω resistor from the ohmmeter and reconnect it to the LED circuit.
TIP: When measuring individual resistors, you can also simply grab the ends of the resistors with the alligator clips.
