Changing Brightness Digitally
A binary value can hold one of two states: 1 or 0. Up to this point, we’ve been using those 1/0 binary values to turn lights on and off with pin14.write_digital(1) and pin14.write_digital(0).
In electronics, digital to analog conversion is used to make things seem like they are analog (varying continuously). For example, with the LED in this activity, you will use the digital values of 0 through 1023 and back to 0 to make the LED light take small steps from dim to bright and then to dim again. The steps will be so small that human eyes cannot perceive them, so it is called “digital to analog conversion”.
The pin14.write_analog() method accepts arguments from 0 to 1023 to set the LED’s brightness from off to full brightness. Here are some examples of write_analog calls that adjust how brightly the P14 LED shines.
pin14.write_analog(1023) # Max brightness
pin14.write_analog(512) # half brightness
pin14.write_analog(256) # quarter brightness
pin14.write_analog(1) # 1/1024th of full brightness
In this activity, you will experiment with write_analog and scripts that control the brightness of the P14 LED. You will also use for loops to make this brightness seem to vary continuously (analog).
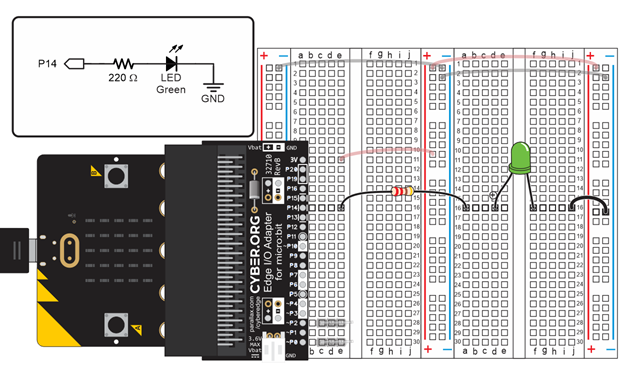
Circuit
For this activity, you will re-use the same setup and LED circuit from Connect and Blink a Light.
- Check your setup and circuit to make sure it matches the one shown below. If it does not, return to Connect and Blink a Light and bring it up to date.