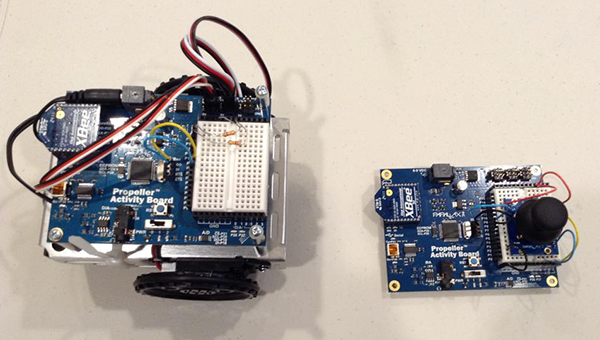
In this step you will be programming your ActivityBot robot and Activity Board Joystick Controller.

Below is the code for the ActivityBot robot:
Note: If you are using the ActivityBot 360° Robot (#32600), the following code will not work because it uses a different drive library. Change #include "abdrive.h" to #include "abdrive360.h" before uploading the code to your robot.
/*
Code for ActivityBot - Joystick-Controlled ActivityBot Project
Author: Vale T
*/

#include "simpletools.h"                       // Include libraries
#include "fdserial.h"
#include "abdrive.h"

fdserial *xbee;
int main()                                    // Main function
{
  xbee = fdserial_open( 9, 8, 0, 9600 );      // Begin the serial connection ( this is why we
                                              // needed the jumper cables connected to pins 8 and 9 )
  char data;                                  // Create the variable that will be used to hold
                                              // the incoming data

  while ( 1 )                                 // Repeat this forever or until loss of power
  {
    data = fdserial_rxChar( xbee );           // Set data to the data received from the XBee board

    if ( data == 'f' )                        // If the data incoming is telling the robot to move forward
    {
      drive_speed( 64, 64 );                  // Move forward at 1/2 speed
    }

    else if ( data == 'b' )                   // If the data incoming is telling the robot to move backward
    {
      drive_speed( -64, -64 );                // Move backward at 1/2 speed
    }

    else if ( data == 'l' )                   // If the data incoming is telling the root to turn left
    {
      drive_speed( 0, 64 );                   // Turn left in a spin turn at 1/2 speed
    }

    else if ( data == 'r' )                   // If the data incoming is telling the robot to turn right
    {
      drive_speed( 64, 0 );                   // Turn right in a spin turn at 1/2 speed
    }

    else if ( data == 's' )                   // If the data incoming is telling the robot to stop
    {
      drive_speed( 0, 0 );                    // Stop
    }
  }
}
Below is the code to upload to the Activity Board Joystick Controller:
/*
Code for Activity Board Joystick Controller - Joystick-Controlled ActivityBot Project
Author: Vale T
*/
#include "simpletools.h"                      // Include simple tools
#include "fdserial.h"
#include "adcDCpropab.h"

fdserial *xbee;                               //Initialize the full-duplex serial connection over XBee

int main()
{
  xbee = fdserial_open( 9, 8, 0, 9600 );      // Open the serial connection
  adc_init( 21, 20, 19, 18 );                 // Initialize the analogue connections for the joystick
  float lrV, udV;                             // Create 2 float values for incoming joystick values

  while ( 1 )
  {
    udV = adc_volts( 2 );                     // Get values from the joystick
    lrV = adc_volts( 3 );
    if ( udV < 1.00 )                         // If joystick going backward, send backward value
    {
      dprint( xbee, "b" );
    }

    else if ( udV > 4.00 )                    // If joystick going forward, send forward value
    {
      dprint( xbee, "f" );
    }

    else if ( udV < 4.00 && udV > 1.00 && lrV < 4.00 && lrV > 1.00 ) // If joystick is in center,
                                                                     // send stop value
    {
      dprint( xbee, "s" );
    }

    else if ( lrV < 1.00 )                    // If joystick is going left, send left value
    {
      dprint( xbee, "l" );
    }

    else if ( lrV > 4.00 )                    // If joysitck is going right, send right value
    {
      dprint( xbee, "r" );
    }
    pause( 50 );                              // Only need to check joystick values 20 times a second
  }
}
At this point you should be finished building and programming. You can power your Activity Board Joystick Controller with the USB programming cable; however, if you want to make it portable, you will need to use the 4 or 5-AA Battery Holder listed in the "What's Required" section on the first page of this project. Fill the holder with AA batteries, plug the barrel jack into the port on the Activity Board, and you're ready to go anywhere with it!
