Like the servos, you’ll be using 3-wire cables to connect the QTI sensors to the SumoBot WX board. Unlike the servo cables, the cables for the QTIs have plugs on both ends. One end gets connected to the QTI, and the other gets connected to the SumoBot WX board.
Parts List
- (2) 8-inch 3-pin extension cables
- (1) SumoBot WX, built up at least through the end of the Build your SumoBot WX pages

Build It
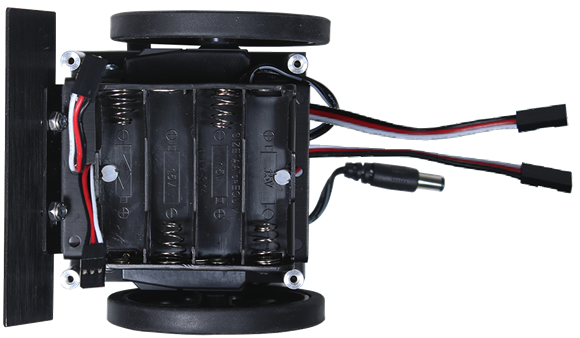
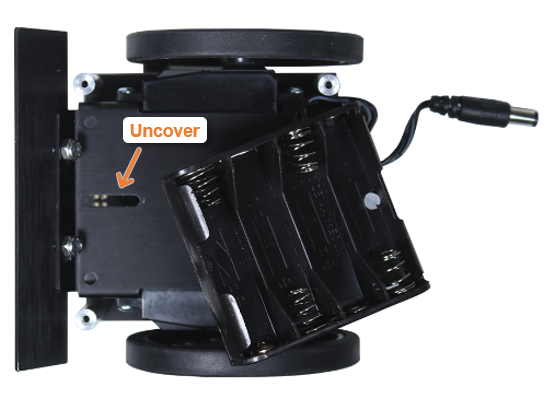
The battery holder partially covers the slot for the cables to pass through, so the first step is to partially remove the battery holder to uncover the slot.
- Remove the batteries from the battery holder.
- Unscrew the front battery pack screw (closer to the plow), and loosen the back one.
- Lift the front of the battery pack slightly to expose the slot in the center of the chassis, just behind the plow.
- Thread both cables into the slot as shown, with the black wires adjacent to each other and the white wires on the outside.
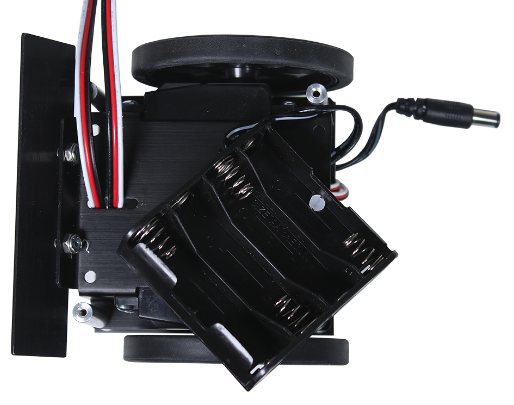
- Pull the cable ends that were inserted into the slot through and to the back of the SumoBot.
- Arrange the other two cable ends as shown. Make sure the front cable end with white-red-black is bent upward, and the other (black-red-white) is bent downward.
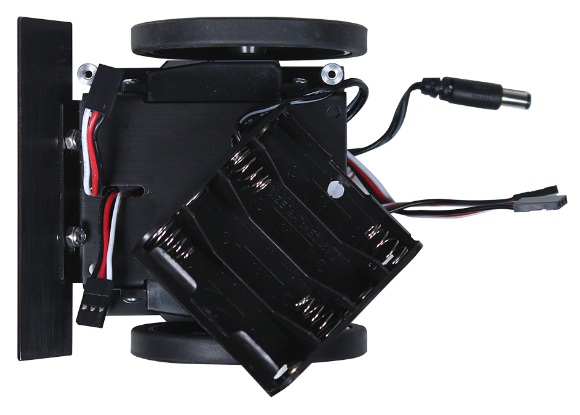
- Re-attach the front of the battery pack with the nylon screw and nut.
- IMPORTANT:
- Again, use a very, very light touch when tightening the battery pack’s nylon screws.
- Don’t let them countersink all the way.
- There should be about a fingernail thickness of flat head above the surface of the battery pack.
- There should be just enough tension to hold the battery pack against the chassis.