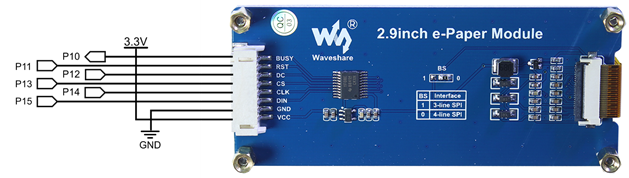
The ePaper module needs 8 connections to do its job. GND on the module must be connected to GND on the Activity Board, VCC should be connected to 3.3V, and all remaining pins must be connected to an I/O pin on Propeller Activity Board.
Pin Connections
The ePaper initialize block is used to set up the ePaper display module. The DIN, CLK, CS, DC, RES and BUSY pins on the module must be matched to the Propeller Activity Board pins they are assigned to:
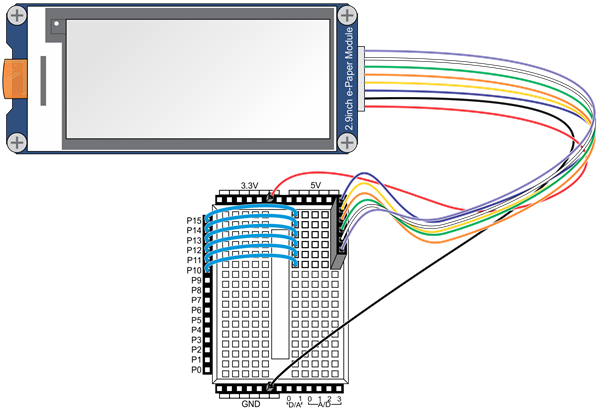
- Plug the ePaper module into the breadboard using the supplied connector harness.
- Connect:
- GND on the module to GND on the Propeller Activity Board
- VCC on the module to 3.3V on the Activity Board
- DIN on the module to P15 on the Activity Board
- CLK on the module to P14 on the Activity Board
- CS on the module to P13 on the Activity Board
- D/C on the module to P12 on the Activity Board
- RES on the module to P11 on the Activity Board
- BUSY on the module to P10 on the Activity Board
Test Program
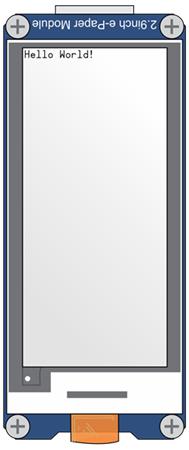
The test project is the classic "Hello World!" text often used to prove that a communication program is working.
- Open BlocklyProp Solo in a Chrome browser and make sure your BlocklyProp Launcher is running and COM port connected to your board.
- Start a new project, and select your board type in the device menu.
- Build the program shown below using the COMMUNICATE > ePAPER blocks: Select ePAPER initialize, ePaper print text and ePaper update blocks .
- Click on the blue text string block and update the text to say "Hello World!"
- Click the Load RAM & Run button.

The ePaper will display the information sent to it by the Propeller:
How it Works
The ePaper initialize block sets up the connections between numbered Propeller I/O pins used to connect to each specific signal line on the ePaper display. The ePaper print text block passes the characters in its text block over to the display and the ePaper update block updates the screen.
- If you are stopping now, turn off power to the ePaper. Otherwise, you are ready to go to the next page - just follow the link below.
CAUTION: Don’t leave the ePaper on for long periods of time. The ePaper can be damaged if left powered on and displaying the same image for more than 24 hours at a time. Use the ePaper command block to “sleep” and “wake” your screen. The ePaper cannot be refreshed directly under sun light. The refresh steps should be done indoors.