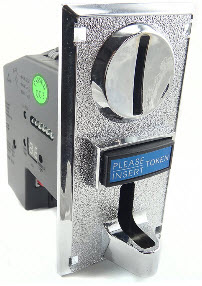
Want to make an arcade game or vending machine? Maybe you want to charge customers to use your awesome invention - but how? Look no further! Coin acceptors have become inexpensive enough for anyone to purchase, so this tutorial is designed to show you how to connect one to your Propeller-powered BlocklyProp project.
Hardware Required
-
(1) - Coin Acceptor (this project specifically uses this one from Amazon)
-
If you choose a different coin acceptor, you may need to make modifications to the instructions. Consult your device's manual.
-
-
(1) - 10 k-Ohm resistor (brown-black-orange) (part of #751-00011)
-
3-pin cable:
-
Propeller development board:
-
(1) - Propeller Activity Board or Activity Board WX (#32912) OR
-
(1) - Propeller FLiP (#32123) plus:
-
Note: The header, breadboard, wires and FLiP can be purchased separately or you can get them (and more) together in the Propeller FLiP Try-it Kit (#32023).
-
-
Misc coins to program the coin acceptor with (20 of each type of coin is best)
NOTE: The 12V supply can be connected to the (→5-9VIN pin) on the FLiP - however be aware that because the input voltage is above 9 volts, if the FLiP module’s power connections are shorted, the FLiP will get VERY HOT.
