This step adds hardware to secure the SumoBot WX board to the chassis now, and also to hold QTI line sensors in the future.
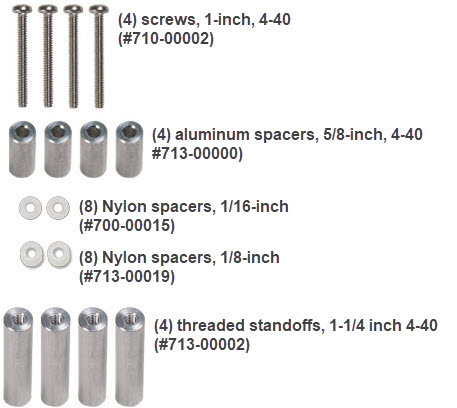
Parts Required for each robot
- SumoBot WX PCB with FLiP module (not shown)
- SumoBot chassis, partly assembled (not shown)
- (4) Screws, 1-inch, 4-40
- (4) Aluminum spacers, 5/8 inch
- (2) 1/16" Nylon spacers
- (2) 1/8" Nylon spacers
- (4) 1 1/4-inch threaded standoffs

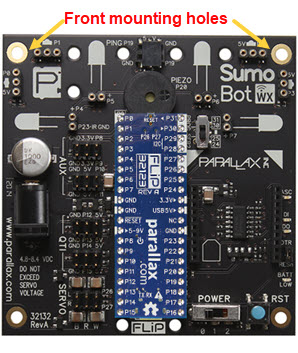
- Locate the SumoBot WX board’s front mounting holes.

- Thread a 1-inch screw through each of the SumoBot WX board’s front corners, from the top side.
- Slide a 5/8" aluminum spacer over each screw.
- Position the PCB over the chassis so that the front corners are over the front scoop mount, and the FLiP module is towards the back.
- Thread the screws through the front mounting holes in the chassis.
- Slide a 1/16" nylon washer over each screw.
- Tighten a 1 1/4" threaded aluminum standoff onto each screw.
- Repeat for the rear mounting holes, but using a 1/8" Nylon spacer.
