Voltmeter Script
- Right-click measure_volts_with_cyberscope.hex (below) and select Save link as...
measure_volts_with_cyberscope.hex
- If it's not already connected, connect your micro:bit module to your computer with its USB cable.
- If you do not already have the micro:bit Python Editor open, browse to python.microbit.org in a Google Chrome or Microsoft Edge browser.
- Click Open, select, and open measure_volts_with_cyberscope.hex.
(See Save & Edit Scripts.) - Click Send to micro:bit.
(See Flash Scripts with Python Editor.) - Click the three vertical dots ⋮ by the Send to micro:bit button, and select Disconnect.
(See CYBERscope Voltmeter.) - Open a new browser tab and go to cyberscope.parallax.com.
- In the CYBERscope tab, click the Connect buttton.
- In the serial port dialog that appears, click the row with mbed in its name to select it, and then click Connect.
Voltmeter Tests
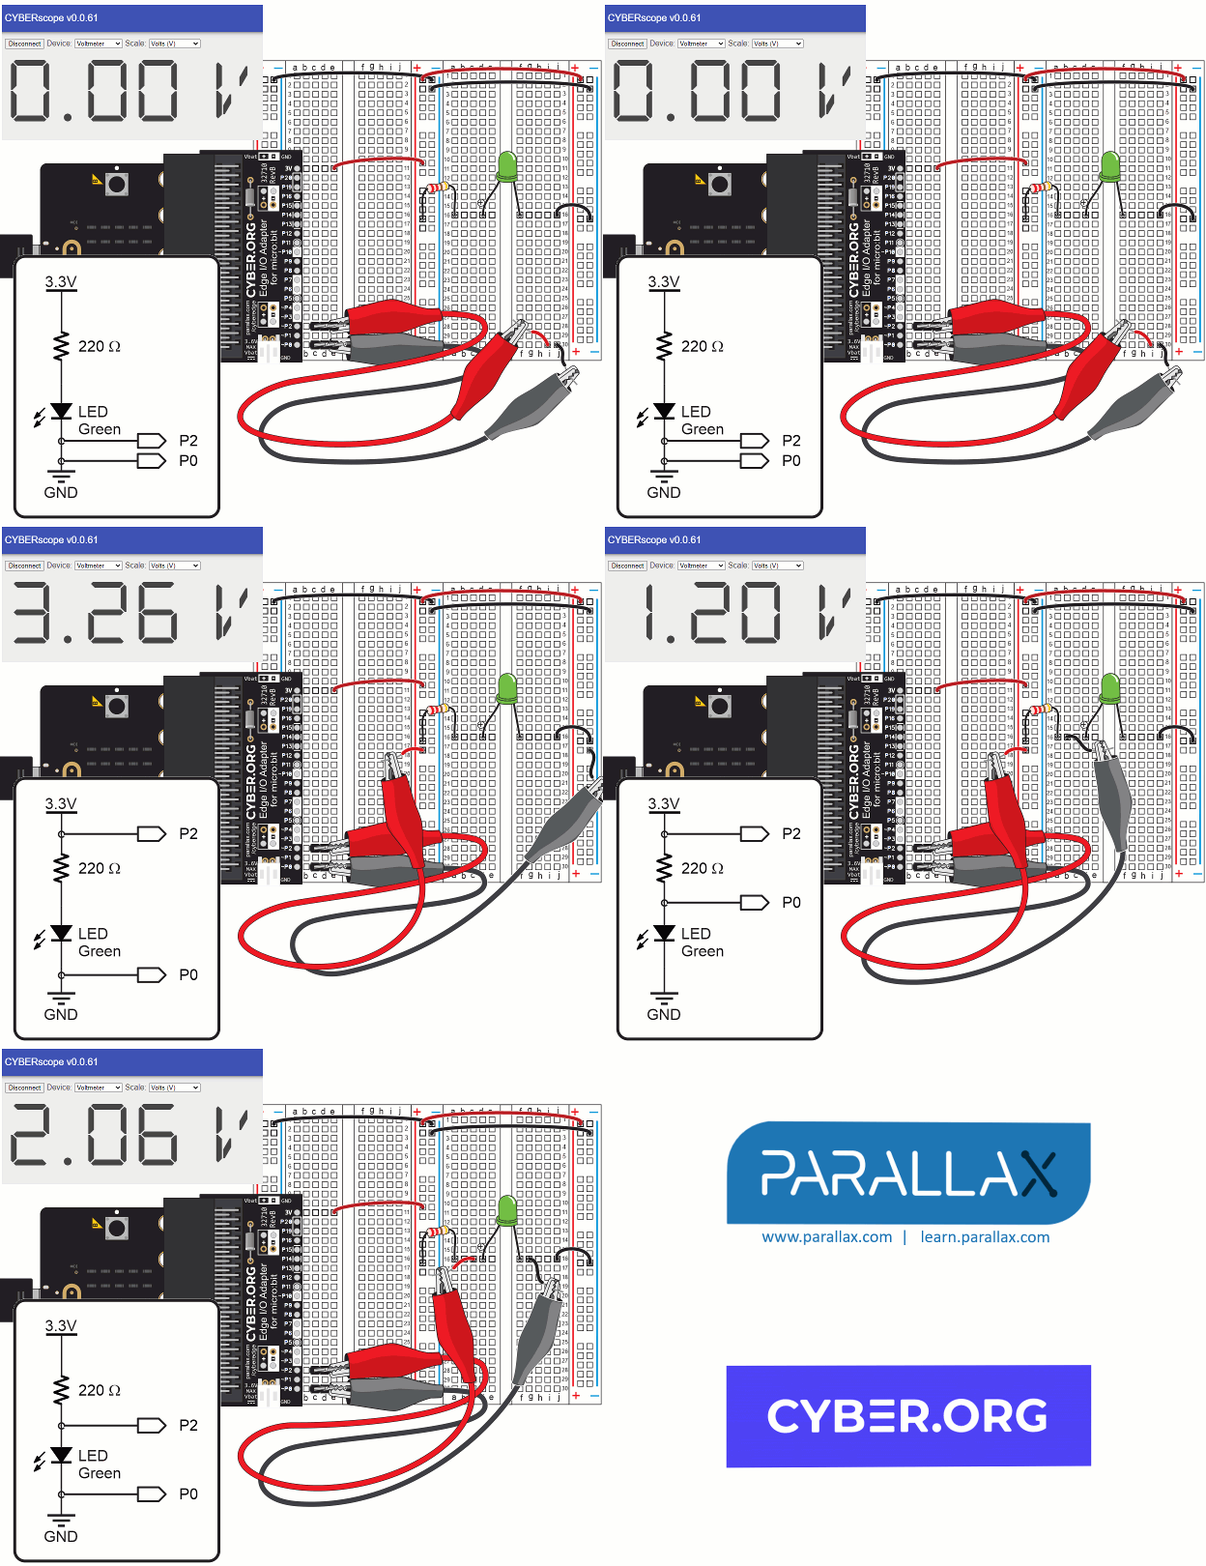
- Use your probes to take the measurements shown in the animation. The measurements are also listed step-by-step below the animation.
In these tests, you will measure voltages across the LED circuit’s components and compare them to the voltage across the +/- supply rails.
- Use the animation and the instructions below it to measure voltage across the supply rails, then the resistor, then the LED.
- Optionally, view the full-size kvl-measurements.mp4 clip to play and pause it between steps.

- Check the voltage when the two probes are connected to the same row. It should be very close to 0.00 V.
- Measure the voltage across the (+) and (-) supply rails.
- Measure the voltage across the resistor.
- Measure the voltage across the LED.
- Add the resistor and LED voltage measurements.
- Compare it to the voltage across the (+) and (-) supply rails.
