First, let's look at how it actually works. Then, we'll give some suggestions for how you could make this project better suit your needs.
How it Works
The program initializes the 4x4 matrix keypad using the FLiP module’s first eight pins (P0-P8). It also sets the states of the seven-segment display pins to outputs, while attaching a binary value of 11111111. Next, the code enters an infinite repeat loop containing a variable called keyNumber that gets updated every pass through the loop. Three individual functions are also run every time through the loop: terminalPrint, checkKey, and beep.
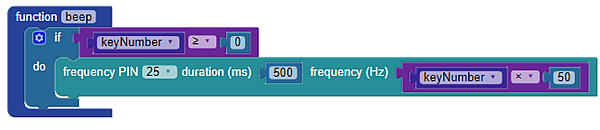
The terminal displays the value from the keypad as -1 if nothing is pressed, or a value ranging from 0-15 if being pressed (depending on which button you are pressing). The checkKey function receives a decimal value from the keypad then set the states of all pins from 8 to 15 to the corresponding binary value. If nothing is pressed, all pins are turned off by making them low (a binary value of 00000000). The “beep” function makes a sound for a half second every time a button is pressed when the value of “keyNumber” greater than or equal to 0.
Try This
Make some modifications to the project to make it work more effectively. Try the following:
- Change the pause block values to see what effect this has on the program. Try shorter or longer values.
- Add a red LED to show when a button has been pressed. The BlocklyProp Build LED Circuits tutorial provides an example.
- Modify the sound played back to be different for each button press. An example of this may be setting the frequency of the speaker to the variable value times 50: