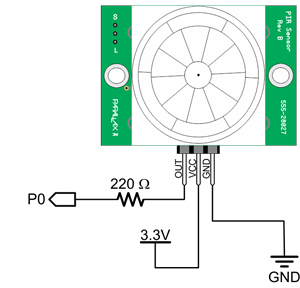
With any good Halloween prop, it’s ideal to have it be somehow motion activated. I added a PIR motion sensor (included in the Animation Kit) to add motion-sensing capability. This way when someone walks anywhere near the front of your prop, the sensor will detect movement and prompt your servo to move the doll out from behind the wall.
I mounted my PIR motion sensor about 2ft ahead of the doll along a walking path so when someone passes by it triggers the doll to move. This ensures it has time to fully peep out when that person arrives at the doll’s location.
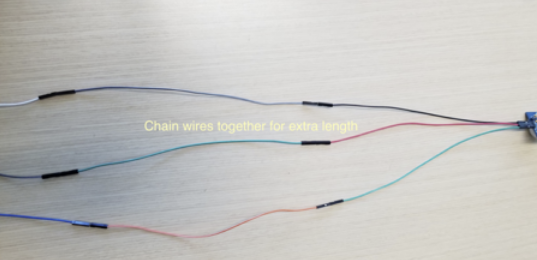
- To do this I used the left-over wires in the Animation kit and chained them together to make my PIR wires longer.
Wiring
PIR
- PIR motion sensor - Connects to P0
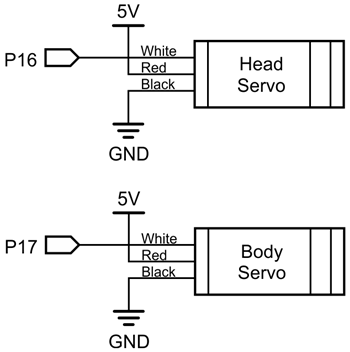
Servos
- Body Movement servo - connected to servo header P17
- Head Movement servo - connected to servo header P16
NeoPixel Ring (Optional - soldering required)
To add a lighting effect, I used a NeoPixel Ring included with the Animation Kit. I used a soldering iron to solder posts into all the Neopixel ring’s available solder pads (Power, Ground, OUT, IN) and inserted it into the breadboard. Based on where you want your lighting effect to be, you may need to solder the ring to jumper wires instead of posts and mount the ring somewhere on the box or doll. This is completely up to you. Where I chose to place the ring gave the doll a spooky back-glow effect once the Activity Board was mounted to the box.
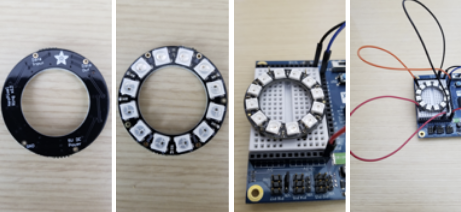
- Red wire connects the ring’s PWR pin to 3.3V
- Black wire connects the ring’s ground pin to boards ground pin.
- Orange wire connects the ring’s IN pin to the board’s pin number 2 (P2).
- OUT is no connection.
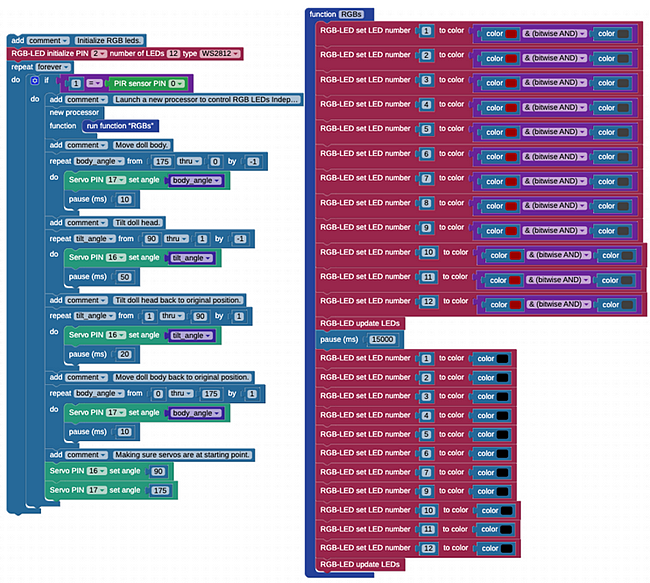
BlocklyProp Code
I don't expect you to recreate this project yourself, so the image below is just for visual reference. Download the blocks file and upload it into your own project.