Step 1 - Making the Locomotion
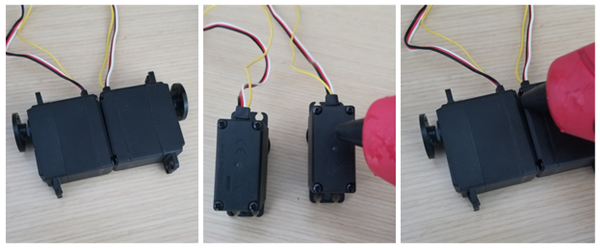
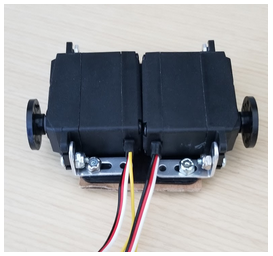
- To create the locomotion mechanism take the two servos and glue them back to back.
- Let the glue settle and dry (about 20min).
- Once the glue is dry, place glue around the seams where the servos join.
This makes up the locomotion, and it also makes the platform that holds the battery case.
Step 2 - Place Sandwich Plates, Wheels, and Mount Servos (Laser Cutting Optional)
Parts used in this step:
- (4) - L Brackets
- (10) - #4-40 pan head screws
- (8) - #4-40 nuts
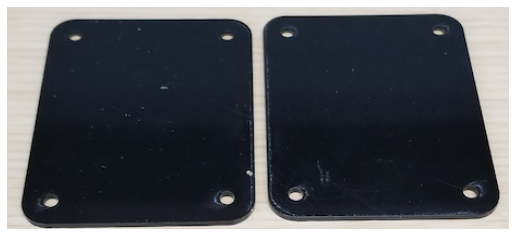
For this part of the project I laser cut custom parts.
The files for laser cutting a top and bottom plate are available below, however if you don’t have access to a laser cutter it is ok to simply glue the servo locomotion platform to the piñata’s cardboard (The laser cut parts are optional). I didn’t get a chance to document this part of the build as I was building it, but the pictures below show a mock up of how the servos are mounted inside the piñata taco.
Piñata Project Laser Cutter Parts Download (.DXF)
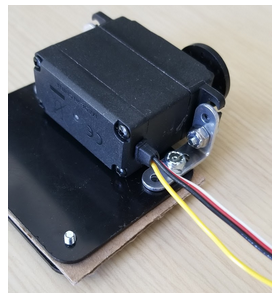
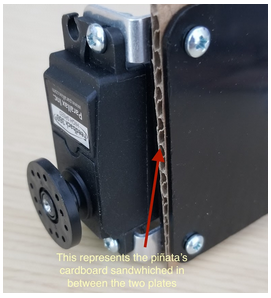
NOTE: The cardboard shown in the images below is meant to represent the piñata’s cardboard bottom sandwiched in between the top and bottom plate. For clarity in showing the build, I have assembled the parts in this step outside of the piñata body so that you can see the placement of the laser cut components. The first image shows only a single servo so you better see the screw placement, though you will already have glued the servos together in your project.
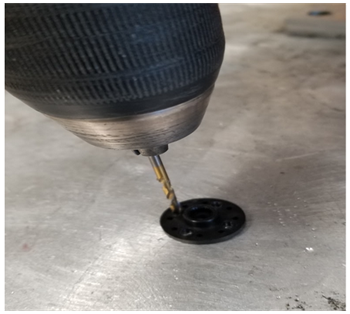
- To add the laser cut wheels you will need to enlarge matching holes on the circular 360° servo horns (using a ⅛” drill bit) so they can be screwed together.
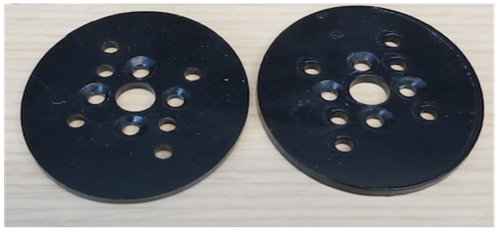
- If you didn’t laser cut custom wheels, another option is to use the optional Small Robot Wheel and Tires linked in the full parts list. These wheels are a direct fit for the Feedback 360° servos and do not require drilling holes - simply remove the horn on each servo and replace it with a wheel.
Here is what the locomotion platform will look like after adding the wheels. I used 8 - #4-40 flat head screws to mount the wheels. Remember that the cardboard shown in this picture is only a visual representation of how the top and bottom plate install over and under the piñata’s cardboard bottom.
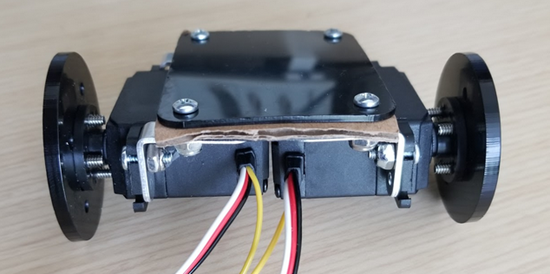
Note: If you are not using custom laser-cut wheels, the finished project will not display the same rocking motion as shown in the video. This effect was deliberately designed by making the wheels slightly ovoid instead of round.