THIS IS A LEGACY VERSION. PLEASE GO TO GETTING STARTED WITH BLOCKLYPROP SOLO INSTEAD.
The original BlocklyProp system is being replaced by BlocklyProp Solo, which requires no login. You will need to replace your Client utility with an updated Launcher.
Need HELP??? If you get stuck, contact Parallax Tech Support: email support@parallax.com. The BlocklyProp Solo Launcher & FAQ for Schools may also be of help.
If you are here, you should have registered for a BlocklyProp account and installed the BlocklyProp Client. If not, please go back to the previous page.
- On your desktop, click the BlocklyProp icon. When the BlocklyProp-Client or Launcher opens, click Connect.
- For Windows or Mac, click Open Browser, and then minimize the window (do not close it).
- A browser window should open the BlocklyProp homepage. Log in to your BlocklyProp account.
- Connect your Propeller board to your computer's USB port with its programming cable. Below are the Propeller FLiP module on a breadboard (left) and Propeller Activity Board WX (right).
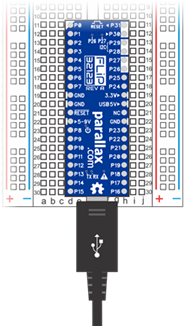
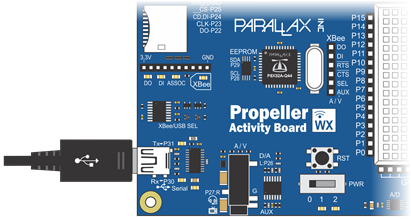
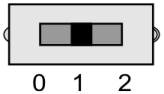
- Make sure to connect the Propeller board to your computer. Both the Propeller Activity Board and the Propeller FLiP module are powered through the USB connection. If you are using an Activity Board, you will also need to move the power switch to position 1:
- Then, return to the BlocklyProp homepage to start programming.
Creating a New Program
In BlocklyProp, programs are often referred to as projects.
- In the toolbar, click New project, and this window will open:
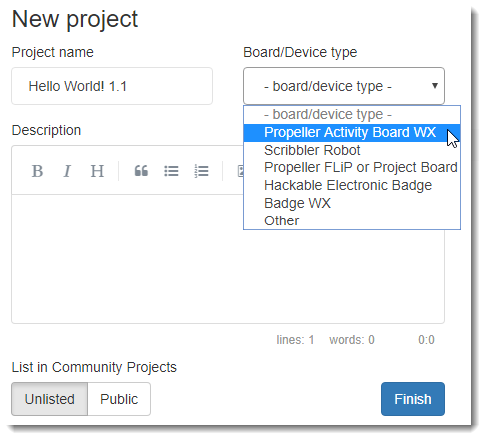
- Type in a Project name (required) and a Description of your project (optional, but a good practice).
- Click on the Board/Device type drop-down menu, and then select the name of your Propeller development board. (Once you've finished making a new project, the board type can't be changed.)
- If you are over the age of 13, you will have the option to choose a Community Projects setting. (You can change this option later.)
- Unlisted: the project won't be shown on the Community Projects list, but will appear in your "My Projects" list when you are logged into your BlocklyProp account.
- Public: the project can be seen and cloned by anyone by clicking on Community Projects.
- When you’ve made your selection, click Finish.
The BlocklyProp Workspace
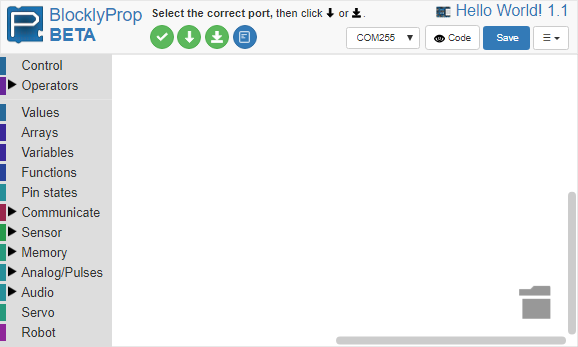
The BlocklyProp workspace starts out blank. To the left of the workspace is a category menu of BlocklyProp blocks (note that these are updated periodically). Clicking items with an arrow will open a sub-category menu.
- Click on a few block menu and sub-menu items. Each time, the sidebar will expand to reveal the blocks available in that category.
To build a program, you will click, drag, and drop these blocks into your workspace in the order they need to run. Blocks placed near each other that are meant to fit together will snap into place with an audible click. You can click, drag, and drop to separate them again if needed. Many blocks have entry fields and drop-down menus you will use to choose how the blocks behave. Some blocks are designed to fit inside other blocks and work together.
Did you Know?
Special formatting is applied to some words to make our Learn site's BlocklyProp tutorials easier to read:
- Words in BOLD CAPITALS are names of block categories, such as COMMUNICATE > TERMINAL.
- Words in bold lowercase are names of blocks, or parts of a block you need to interact with, such as the Terminal print text block.
- Words in italics are equations, parts of equations, or hints. For example, d = rt is an equation meaning distance = rate multiplied by time.
Try This - Hello, World! Program
- Click on the left-side COMMUNICATE category, then on the TERMINAL subcategory
- Choose the terminal print text block and drop it in the workspace.
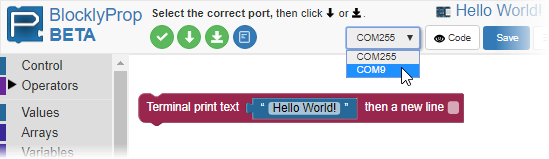
- Place your cursor on the blue block inside the terminal print text block and type “Hello, World!” Your block should look like this:

- SAVE YOUR PROGRAM! Click the blue Save button on the right end of the toolbar. It should briefly flash green with a checkmark to indicate your program has been saved. BlocklyProp does NOT automatically save your blocks in the background while you work. So, SAVE EARLY, SAVE OFTEN! If you have not saved your program for 20 minutes, a pop-up message may remind you.
The BlocklyProp Client is needed to download programs to the Propeller microcontroller. If it is not connected, you will see the message "Looking for BlocklyProp Client" or "BlocklyProp Client is not running" in the toolbar above the round buttons. If all is well, you will instead see the message "Select the correct port, then click...."
- Make sure you have the BlocklyProp Client running.
- From the first drop-down menu in the toolbar, select the COM port connected to your Propeller board.
You have some choices for running your program.
- Hold your cursor over each round button, left to right, to read the hints on what they do.
 Verify code (compile): The checkmark button builds your code and checks it for errors, but does not load it to your Propeller board. A Compile message window will pop up, and if it ends with "Compile successful" then you can continue. If not, read the messages for clues to where you may have an error in your code. Close the box when you are done.
 Run Once (load code to RAM): The green arrow loads the program to the Propeller chip's RAM—Random Access Memory. It is volatile memory, meaning it will be erased if power gets disconnected or the Propeller is reset. If you are keeping your project connected to the computer, especially while writing and testing your programs, then this button is fine. If you want to be able to unplug your project from the USB port, use the next option.
 Load and Run (save code to EEPROM): The green underlined arrow loads the program to EEPROM—Electrically Erasable Programmable Read-Only Memory. The EEPROM memory chip on the Activity Board WX is non-volatile, so programs will remain in your board's memory even after it has been turned off or reset. Use this option when you are sure your program is complete and ready to use away from the computer.
 Open Serial Terminal: The first blue button opens an on-screen window that can display messages from, and send characters to, the Propeller board. If you have a Terminal block in your code, then the terminal will automatically open when you run it, so this button is needed only in certain applications.
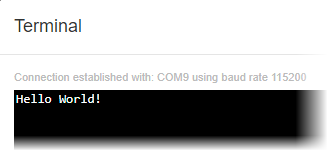
- Click the Run Once button.
After a download progress message, the Terminal should appear and print your “Hello World!” message.
If the Terminal does not open, and you see a message like the one below, it means that BlocklyProp cannot find your Propeller board:
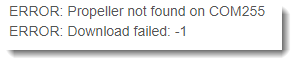
Try these fixes:
- Make sure your USB cable is plugged into both your board and your computer securely at both ends.
- If you are using the Propeller Activity Board, make sure the power switch is in Position 1 or 2.
- Make sure you have selected the right COM port for your board.
Your Turn
- SAVE A COPY! It is always a good habit to click Save before making changes to your code. Click the drop-down menu next to the Save button, and choose Save Project As. Enter a new name and click Confirm.
- Add to your program above by adding a personal message, like this:

- You should get a message like this (it's good, but not perfect):
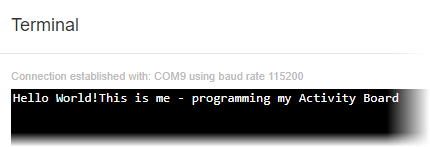
- Can you modify the program you’ve just written to add a space between the “!” and the next message that begins with “This”?
- Can you figure out a way to place the Hello World! message and your personal message on separate lines in the Terminal? (Hint: Take a look at the other TERMINAL blocks and at the checkbox on the terminal print text block).