To get started using Codebender instead of the Arduino IDE, click here.
Here is a screen capture of the Arduino Development Environment edit pane on the left, containing a simple sketch that sends a “Hello!” message to the Serial Monitor window on the right.
- Open your Arduino software and carefully type in the code:
void setup()

{
  Serial.begin(9600);
  Serial.print("Hello!");
}

void loop()
{
  //Add code that repeats automatically here.
}
- Be sure you have capitalized “Serial” both times, or the sketch won’t work.
- Also, notice in the figure that the sketch uses parentheses() and curly braces {}. Be sure to use the right ones in the right places!
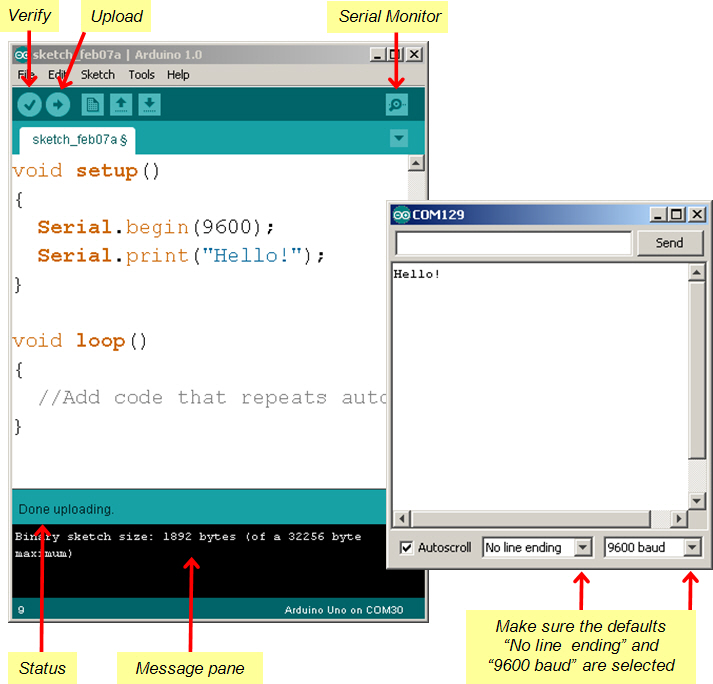
- Click the Verify button to make sure your code doesn’t have any typing errors.
- Look for the “Binary sketch size” text in the message pane.
- If it’s there, your code compiled and is ready to upload to the Arduino.
- If there’s a list of errors instead, it’s trying to tell you it can’t compile your code. So, find the typing mistake and fix it!
- Click the Upload button. The status line under your code will display “Compiling sketch…,” “Uploading…,” and then “Done uploading.”
- After the sketch is done uploading, click the Serial Monitor button.
- If the Hello message doesn’t display as soon as the Serial Monitor window opens, check for the “9600 baud” setting in the lower right corner of the monitor.
- Use File → Save to save your sketch. Give it the name HelloMessage.
Now you are ready to see How the Hello Sketch Code Works.