Parts List
(4) pan-head screws, 1/4″ 4-40
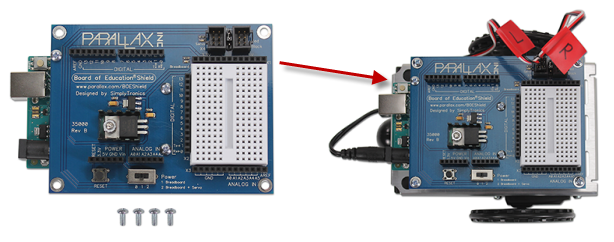
(1) Board of Education Shield mounted to your Arduino module and secured with standoffs.
Instructions
- Set the BOE Shield on the four standoffs, lining them up with the four mounting holes on the outer corner of the board.
- Make sure the white breadboard is closer to the drive wheels, not the tail wheel.
- Attach the board to the standoffs with the pan head screws.
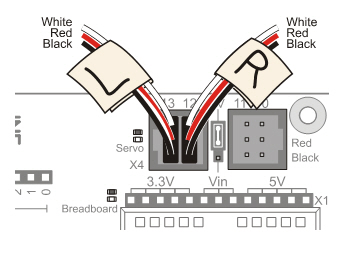
- Reconnect the servos to the servo headers.
Using Different Pins for the Servos
The Arduino toggles Pin 13 briefly upon startup or reset. If this causes problems for a particular application, you can use Pins 11 and 12 instead of 12 and 13. Be sure to adjust your code accordingly.
If you are building the BOE Shield-Bot to use with ROBOTC instead of for this tutorial, follow these instructions for using different servo ports.
- From the underside of the chassis, pull any excess servo and battery cable through the rubber grommet hole, and tuck the excess cable lengths between the servos and the chassis.