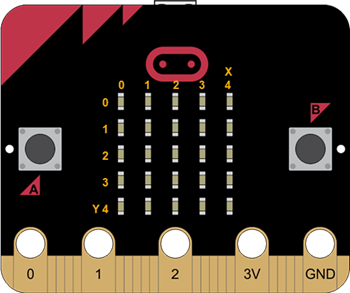
The micro:bit module has a 5x5 matrix, or grid, of LEDs on the front of it. An LED, or Light Emitting Diode, is an electrical component that allows electricity to flow through it in only one direction.
When an LED is hooked up in the proper direction and electricity is applied, the LED lights up. The 25 LEDs on the face of the micro:bit module are already connected so that we do not need to worry about their connected direction, however, additional LEDs can be connected to the cyber:bot using the breadboard.

Collectively these 25 LEDs form the display of the micro:bit module. The micro:bit module can be programmed so that the LEDs can show images, scroll text across the screen, or be individually illuminated to a variety of brightness levels.
Each LED row (x axis) and column (y axis) is numbered 0 through 4, so each LED can be identified individually. But first, we will try convenient, ready-made instructions for displaying scrolling text and predefined images.
Using the micro:bit module Reference
The three pages that follow this one will cover what you need to know to work through the cyber:bot tutorials. But, it is by no means entirely comprehensive. Feel free to check the official MicroPython documentation any time.
