Now that we’ve got one micro:bit broadcasting radio messages every 2 seconds, let’s program another micro:bit to receive those messages and display them in the terminal. Both micro:bit modules have to be running their scripts at the same time. The radio receiver micro:bit will also have to be connected to a serial monitor so that it can print what it receives.
- Complete one of these three options:
- Recommended - Option 1: Connect the micro:bit that will run this receiving script to a second computer and terminal.
- Option 2: Disconnect the micro:bit that’s sending radio messages from your computer, and connect it to a battery supply. Then, connect a micro:bit that’s going to receive messages to your computer’s USB port and a terminal.
- After disconnecting the radio sender micro:bit from USB, connect it to a battery supply so that it continues to run the script that sends radio messages.
- Connect the micro:bit that’s going to run the radio receiver script to your computer’s USB.
- Option 3: Connect the micro:bit that will run this receiving script to a second USB port on the same computer.
- Open a second Chrome/Edge browser and tile it side-by-side with the other browser that has a micro:bit Python Editor.
- Navigate the second browser to the micro:bit Python Editor at python.microbit.org.
- Click the three dots ⋮ by the Send to micro:bit button, then select Connect.
- Set up the connection to the receiver micro:bit. You will have to choose between micro:bits in the python.microbit.org wants to connect popup.
- If you accidentally connect both micro:bit Python Editor to the same micro:bit, you might have to unplug them both from USB, then replug them. Then, repeat the process of clicking the three dots ⋮ by the Send to micro:bit button in each editor. Make sure to pick a different micro:bit from the python.microbit.org wants to connect popup for each editor.
Now, you are ready to load a script into a second micro:bit for receiving radio messages.
Example script: receive_radio_test_message
- Set the project's name to receive_radio_test_message, enter the script below, and then click Save.
(See Save & Edit Scripts and Flash Scripts with Python Editor.) - Click Send to micro:bit.
(See Flash Scripts with Python Editor.)
# receive_radio_test_message

from microbit import *
import radio

radio.on()
radio.config(channel = 7)

sleep(1000)

print("micro:bit radio receiver")

while True:
    message = radio.receive()
    if message is not None:
        print("Receive: ", message)
- Click Show serial to open the serial monitor.
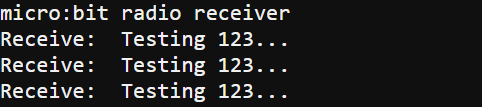
(See Use the Serial Monitor.) - Verify that it displays the Receive: Testing 123… line, and adds a new line every 2 seconds.
How Receiving Messages Works
The micro:bit that’s receiving messages has to be set to the same channel as the one that’s sending messages.
radio.config(channel = 7)
Inside this while true loop, the statements will repeatedly check to find out if the radio received a message. It will only print a message it received to the terminal once, and then go back to waiting for the next message.
while True:
A message variable is created and set to the result returned by radio.receive() returns. If a radio message was received, that result is a string. If no radio messages were received, that result is None.
message = radio.receive()
If the message variable is None at this point, the script will skip the statement that displays the message. On the other hand, if message has a string, the script will print it in the terminal. That’s because if message is not None: only executes statements below and indented from it if radio.receive() copied a string into the message variable.
if message is not None:
        print("Receive: ", message)
If the message variable does have a string, display it in the terminal with print(“Receive: “, message).
Did You Know?
The channel = 7 setting is actually the default channel. Classrooms with micro:bit modules can set up more than one broadcasting module, each set to a different channel that sends a different message. The rest of the class can run receiver scripts that “tune in” to one of those broadcasting channels. For best results, keep the channels as widely separated as possible. For example, if there are five broadcasting micro:bit modules, use channels 0, 20, 40, 60, and 80. Each one should broadcast a unique message so that students can verify which micro:bit they are receiving messages from.
RF is an abbreviation for radio frequency.
The sender micro:bit is broadcasting. Broadcasting is one-to-many communication. One broadcasting unit, many receivers. True, if you just have one receiver, it’s actually one-to-one communication. However, if you have more than one micro:bit, they can also run scripts that receive and print, which makes it one-to-many.
The micro:bit has other built-in network configurations. The config method also has address= and group= settings. You can use them in scripts to set up networks on the same channel. That way, each micro:bit can use the group and/or address setting to reach only the micro:bit that is in a given group and has a specific address. You will use these in later activities.
Here’s an excerpt from the micro:bit MicroPython Radio reference:
The channel (default=7) can be an integer value from 0 to 83 (inclusive) that defines an arbitrary “channel” to which the radio is tuned. Messages will be sent via this channel and only messages received via this channel will be put onto the incoming message queue. Each step is 1MHz wide, based at 2400MHz.
2400 MHz is a radio frequency that reverses the voltage applied to the antenna at 2400-million times per second. It’s another way of saying 2.4 GHz, which is 2.4-billion times per second. In terms of the numbers:
2400 M = 24 million = 2400 * 1,000,000 = 2,400,000,000
2.4 G = 2.4 billion = 2.4 * 1,000,000,000 = 2,400,000,000
Channel 0 sets the radio frequency to 2400 MHz, channel 1 to 2401 MHz, and so on up to channel 83 at 2483 MHz. In terms of GHz, that’s 2.401, 2.402, and so on through 2.483 GHz.
The channel setting also makes it possible to avoid a particular Wi-Fi network that might be crowding the band with radio traffic. Wireless routers use channels 1 through 14, with frequencies of 2412 through 2484 MHz (2.412 through 2.484 GHz).